Android POD User Guide
The latest addition to the Season Suite is Season Road redesigned to work on an android device.
Things covered in this article;
- Mobile Device Setup
- User login credentials
- How to install the application
- How to Navigate and operate the software
Mobile Device Setup
With the android road system the device is set up from season office which is useful for managing your fleet from the office without need for the device to be brought back into the store. To get to the setup if you go to the operations tab on the right, go down to the section ‘Mobile Road’ and then click on ‘Mobile Device Setup’.
You will get the below setup menu, for anyone who had the windows software you will have device IDs set up from your existing vans but if not you can set up new IDs. you will then give the device a name it is best to name it after the driver who will be using it and finally you can assign it to the route it will be on.
If you had the old windows software, before making the change to the android device make sure that the last order, invoice and cash number are synced with what is on the device

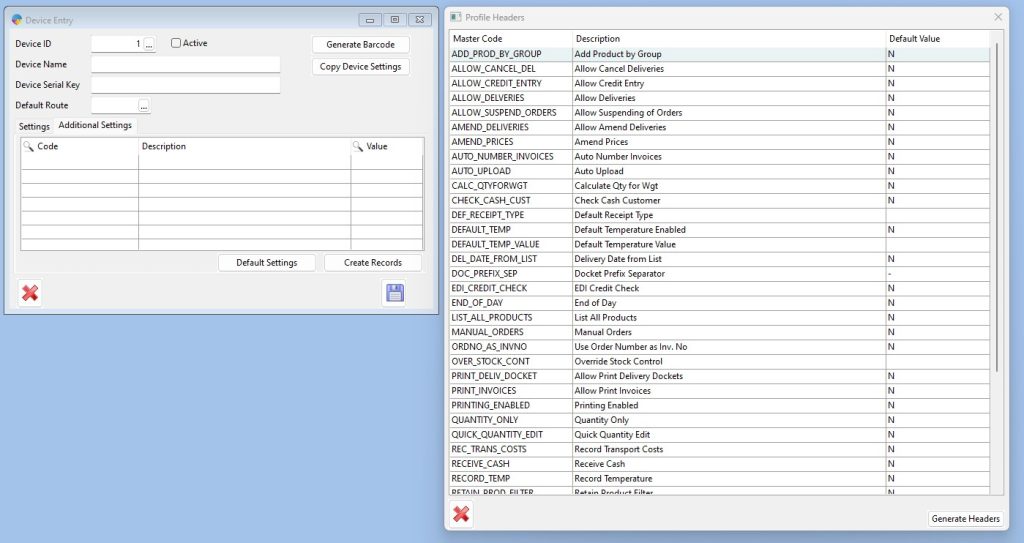
Once you have got the device setup, the next thing you can look at is giving the user permissions. To set this up you will go to ‘Additional Settings’ and click on default settings, this is the settings used by every device although if you want to give certain people more permissions than others you will click create records and give them permissions based on device. When you click generate headers it will list all the settings from here you can go through what you want to allow them to use and add the letter ‘Y’ and for things they aren’t allowed leave the letter ‘N’.
For devices that have different permissions than the default settings you can copy these settings to different devices by clicking ‘Copy Devices Settings’ from here you will enter the device ID that will inherit these permissions.
User login credentials:
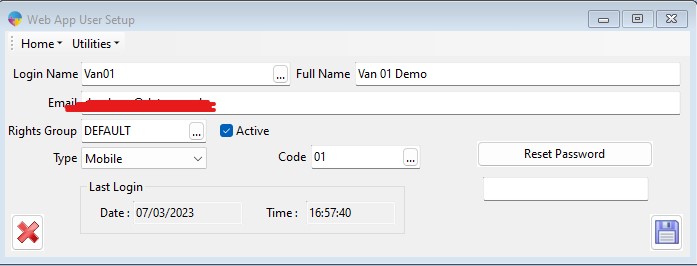
To allow the van driver to use their device you need to create them an account. To do this you will go to the season logo on season office > click on set up office > click on edit user account settings.
The setup is very standard you will enter a user name, assign the credentials to a route and then click reset password to get a password. your password will be random but you will have the ability to change this later.
How to install the application
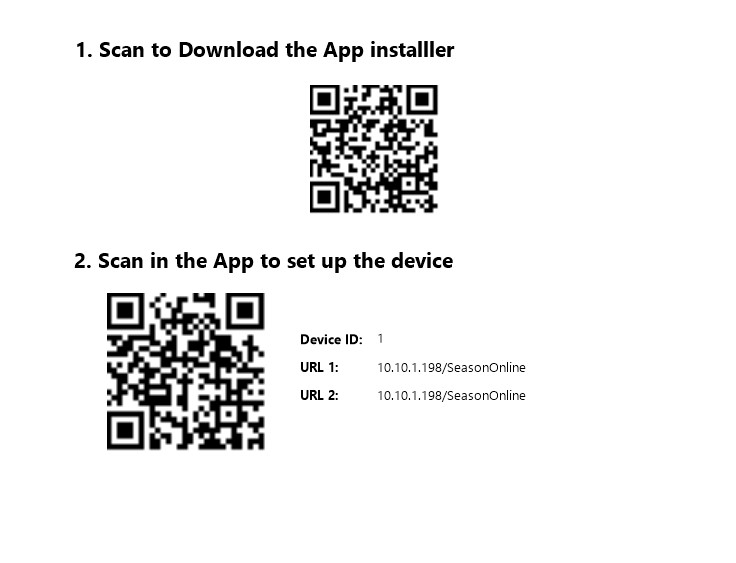
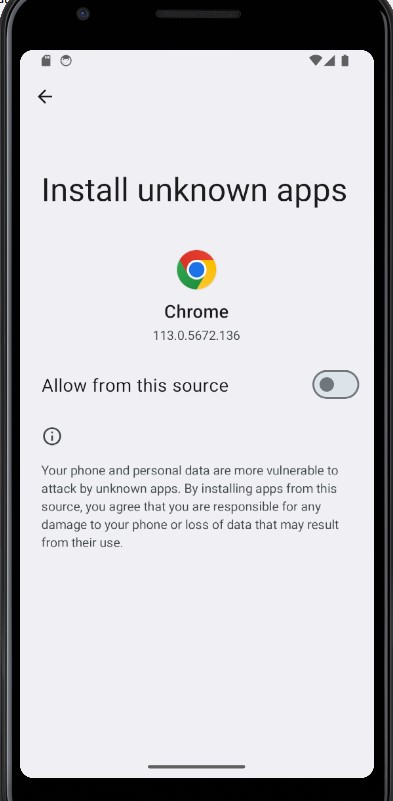
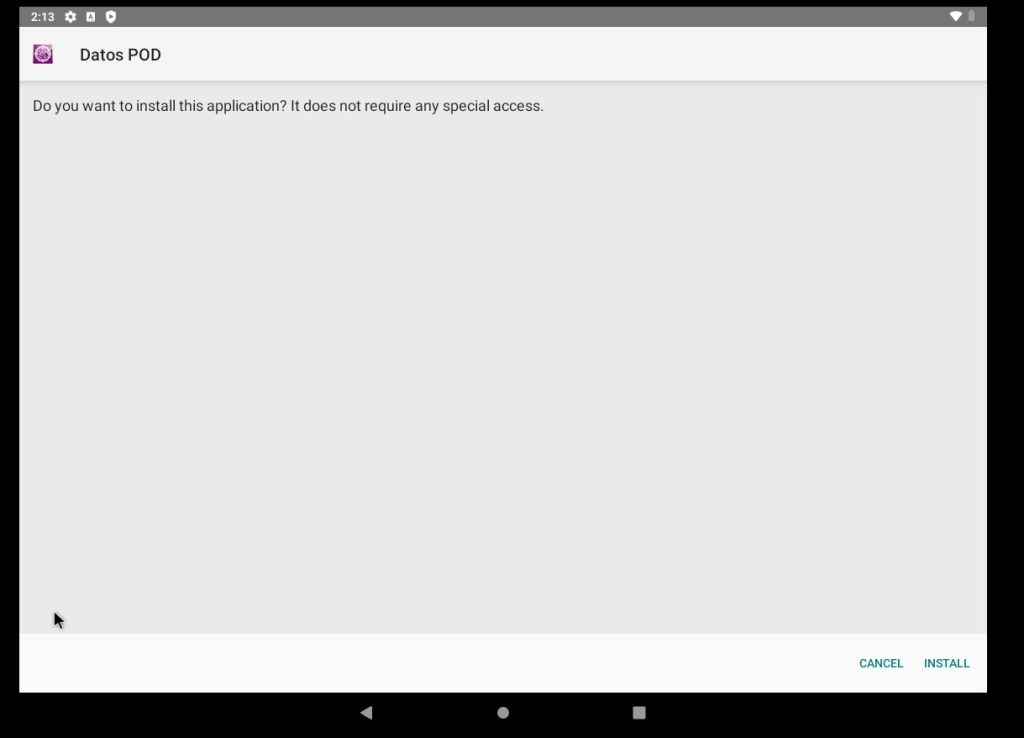
To install the software you will need to go into the device set up section again and from there click generate barcode. You will then get 2 barcodes, the first barcode will install the software, you will then have to scan the second barcode for you device ID, this will then copy and set up the previously set up system settings
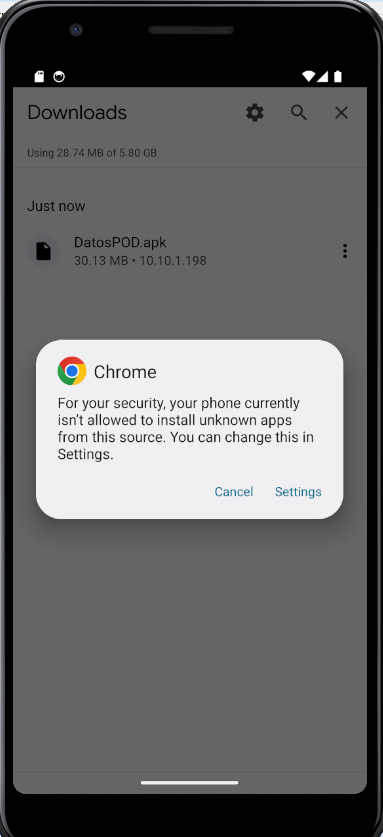
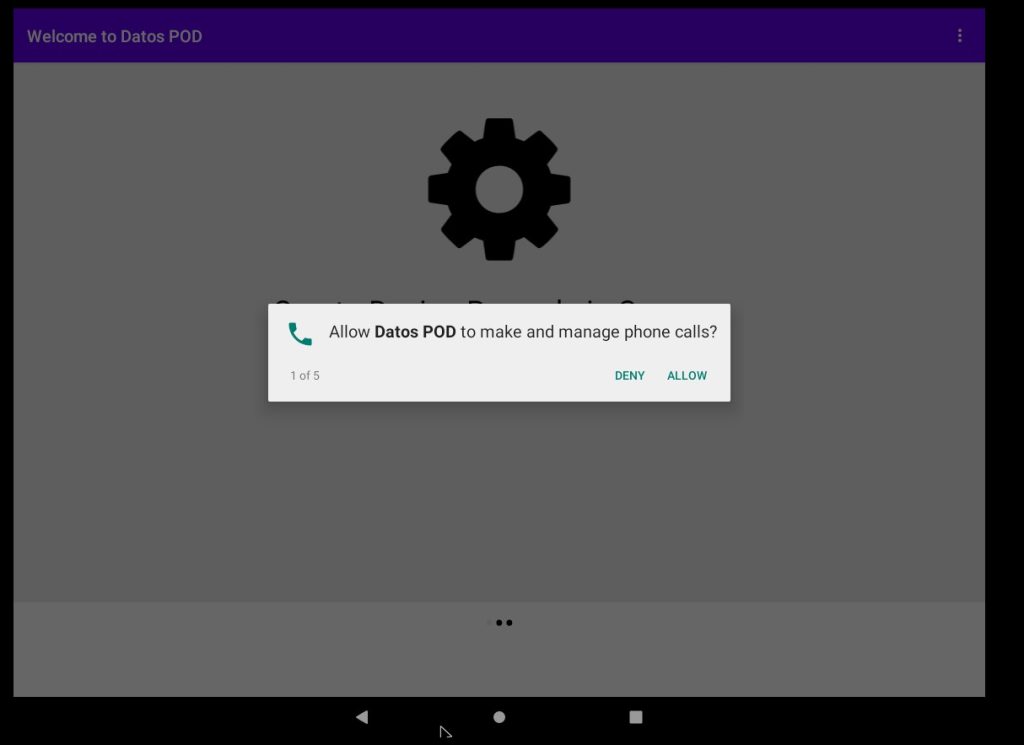
When you scan the barcode the below screen will prompt you to install, when it finishes installing open the software up. It will ask you to grant permissions for the software, click on allow for all as these are key features within the program.
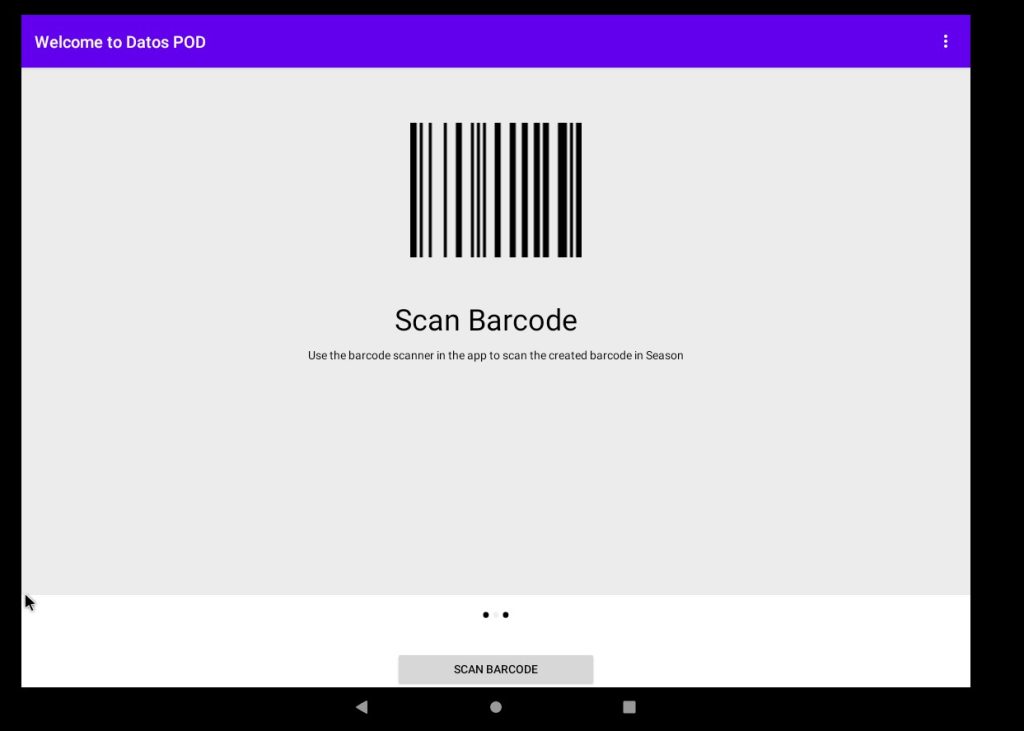
At the end you will have the option to scan barcode, if the barcode wont scan you will need to enter in the information manually
How to Navigate and operate the software
Road:
- Route list: In this section it will list all the customers who are to be visited based on todays date. You can then enter a new invoice for orders that are being left by the van drivers, this will then what gets uploaded at the end of the day to season office to be processed onto their account, unless the customer is cash on delivery. You also have the ability to view the information of the customer and where the delivery address is set
- Fetch deliveries: any orders that have been placed online and are being sent out on the van can be downloaded from here. any deliveries downloaded can be viewed in the route list section
- Data to upload: this is where you can upload individual orders that you are finished working on once you have finished.
- Upload Data: this is where you can upload all of your completed invoices all at once
- End of day: This is where you can print out all your end of day reports ie, sales report, returns, cash, stock reports
- Van stock order: Where the driver can update to the main office system what stock they have on their van and what they need to re order
CRM:
Within the CRM this is another method of being able to enter in a new order/invoice for customers who are not typically on a drivers route, you can also view your customers list along side any open orders or invoices
Settings:
From here you will be able to view your system settings and make any changes if necessary, some other things useful in this section is
- Customer List
- Product List
- Database maintenance: this is where the driver will sync the data from season to his handheld, this can be done when you are making price changes and other customer adjustments. there is also the ability to backup the database to your server and restoring it if you are replacing a device.
- Printer Settings: A new feature for the handheld is you can now pair directly to your printer and the settings will automatically fill in and start working. there is a test button which will print out a test page if the printer is correctly setup