How to: Set up Credit Control
Creating Credit Status Codes
Season will have some basic credit status codes set up but you have the ability to edit/create your own credit status codes. You just need to follow the rules seen below when setting up you codes. Codes are set up in the System Settings.
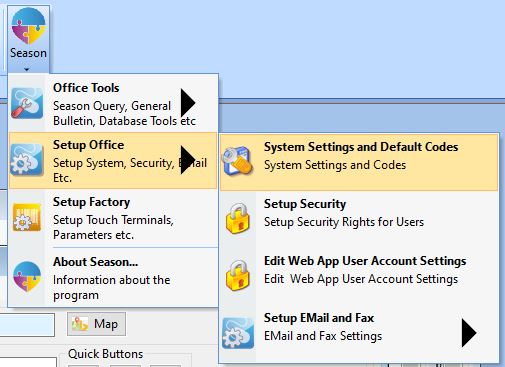
From the Main Season menu found along the top of your screen, select Setup Office > System Settings and Default Codes.
When you system settings window appears on screen, you need to select the General tab > Master Codes tab. You will then see a list of Codes, one of those will be called “CREDITSTAT”.
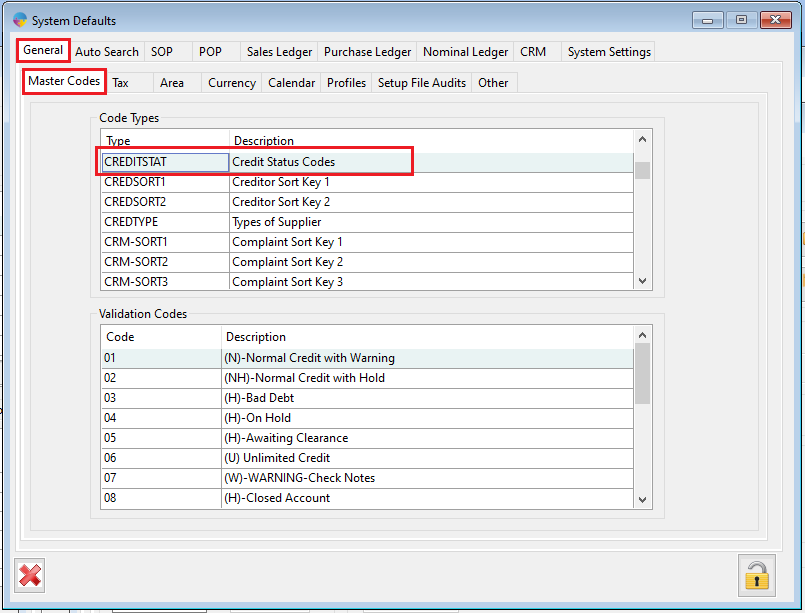
With “CREDITSTAT” selected you will see a list of the existing credit status codes showing in the bottom grid. To add a new code you need to go to the first available blank line and then enter a new code and give the code a description. Remember you need to follow the rules laid out below when giving your new code a description.
Rules
- If “W” is in the description, warn the operator
- If “H” in the description hold the order.
- If “DD” is in the description do a check on the due date for payment, a number can be added after “DD” to determine how many days to check after the due date. After that the the “W”arn “H”old rules also apply.
Code Description
01 (N) Normal Credit (Check credit limits and if necessary warn operator)
02 (NH) NH=Normal Credit (Check credit limits and if necessary hold the order)
03 (H) Bad Debt (Hold Order)
04 (H) Customer On Hold (Hold Order)
05 (H) Awaiting Clearance (Hold Order)
06 (U) Unlimited Credit (Return with no warning)
07 (W) Warn Telesales (Warn Operator)
08 (H) Closed Account (Hold Order)
09 (DDW0) Warn if beyond due date (Warn Operator)
10 (DDW07) Warn if 7 days > due date (Warn Operator)
11 (DDW14) Warn if 14 days > due date (Warn Operator)
12 (DDW21) Warn if 21 days > due date (Warn Operator)
13 (DDH0) Hold if beyond due date (Warn Operator)
14 (DDH07) Hold If 7 days > due Date (Hold Order)
15 (DDH14) Hold If 14 days > due Date (Hold Order)
16 (DDH21) Hold If 21 days > due Date (Hold Order)
Adding the credit status to Customers
When you have the codes required set up, you can assign the codes to your customer accounts. This is done through the customer set up window.
- Open the Customer Setup Window. Go to Sales Invoicing or Sales Ledger > Customer Setup.
- Select the Settings tab > Credit Control Settings tab.
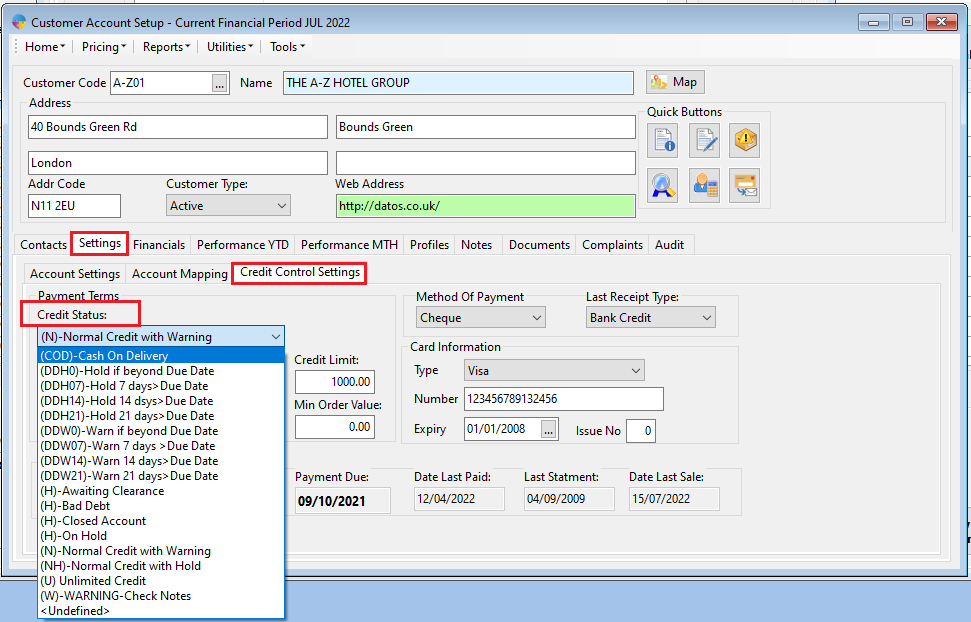
- Click on the credit status field and you will see a drop down list of all available codes that can be assigned to your customers. Select the required code.
- Click the save icon at hte top of your screen or press F” on your keyboard.
- When prompted to confirm the save, click Yes.
Payment terms and Credit Limits
Along with setting up your credit status, you will likely want to set payment terms and potentially a credit limit for the customer as well. As above, on the Credit Control Settings tab, just as above, you will see the Credit limit and the Days/Months/DueDay fields.
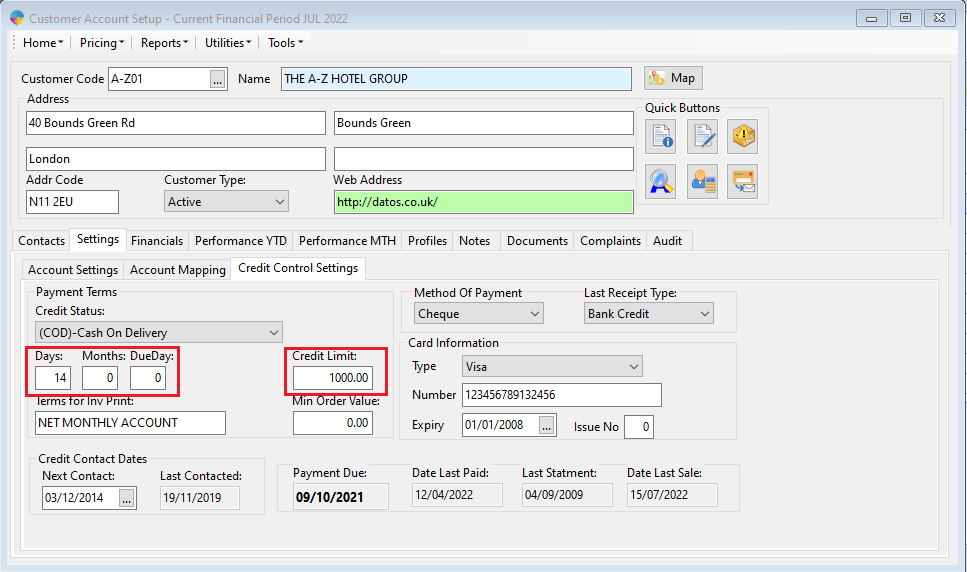
Credit Limit – This will be the total credit you are willing to allow a customer. Once this limit has been hit, depending on your credit status codes, operators will be warned or fully block when entering an order for the customer.
Payment Terms – The Days/Months/Dueday fields will allow you to set the length of time you are willing to allow them to pay off an invoice.
- Days – This will be the amount of days used to calculate the due date of an invoice. Leaving Zero in the box will default to 30 days.
- Months – The same principle as Days, your just using months instead.
- DueDay – This allows you to select a specific day of the month that you want invoices to be paid by. Invoice due dates will always be this day of the following month. E.G. DueDay 30 will mean all invoices posted in the current month will be due by the 30th of the following month.