How To: Export/Import Telesales Call Lists
How to Export the Telesales call lists
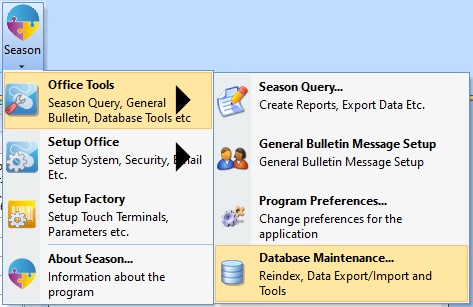
Go to the main Season menu found along the top of your screen, go to Office Tools and then select Database Maintenance.
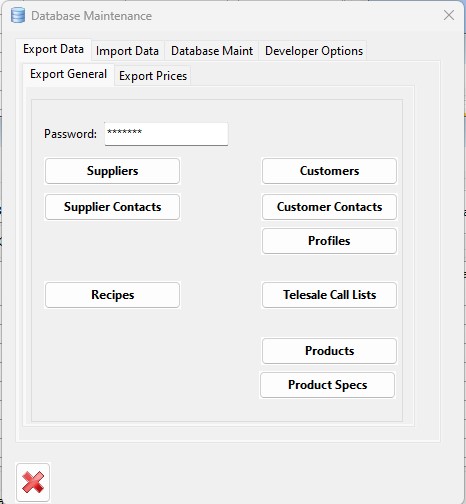
On the next window, select the tab Export Data followed by the Export General tab underneath. Click the button for Telesale Call Lists.
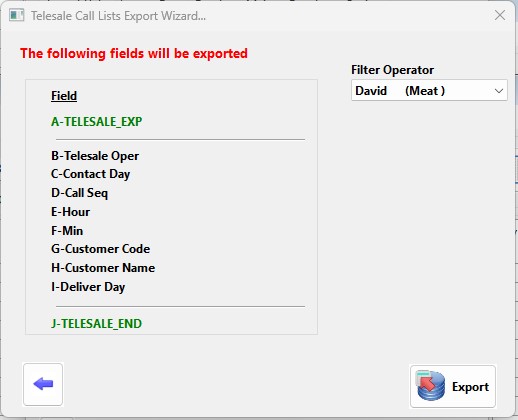
A new window will open, here you will see what data will export for you and in which format the data will appear. You will also see an option to select a telesales operator to the right of the window. You can leave this blank to export all operator call lists or select an individual operator to export just their list. When you are ready to export, click the export button.
When you click the export button, your file explorer window will open. You will need to select a location and give a name for the file you are exporting. Once that is done, click the save button. Your file explorer window will close and you will be prompted to confirm the export. Click yes to complete the export. A box will pop up to confirm when the export is finished, you can then browse to the location you saved the file and open it.
How to import a Telesale Call List
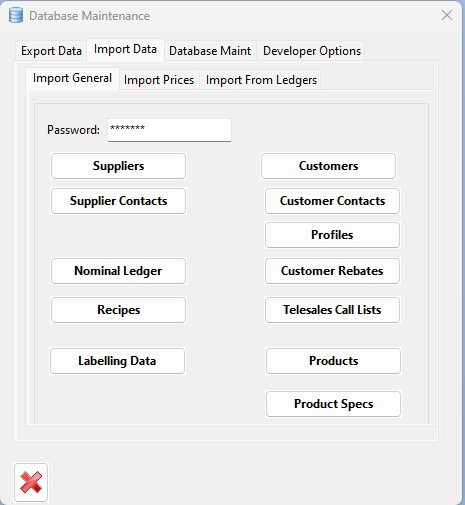
Follow the first step in the export process above to open the database maintenance section. Once there, select the Import Data tab followed by the Import General tab below that. Click the button for Telesales Call Lists.
A new window will open, here it tells you which format you need to have the data in to import it in. You need to have “TELESALE_IMP” in column A followed by the correct data in each column following that ending with “TELESALE_END” in column J. If you have exported the data out first, the data will already be in this format, you will just need to make sure to change column A and J as those are different on the export.
**Please Note – Importing a list for any operator will clear any existing lists within the system for that operator. List for any operators not included in your import will be untouched**
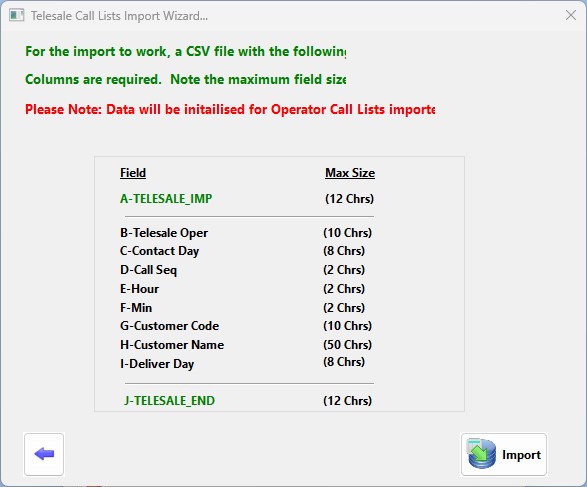
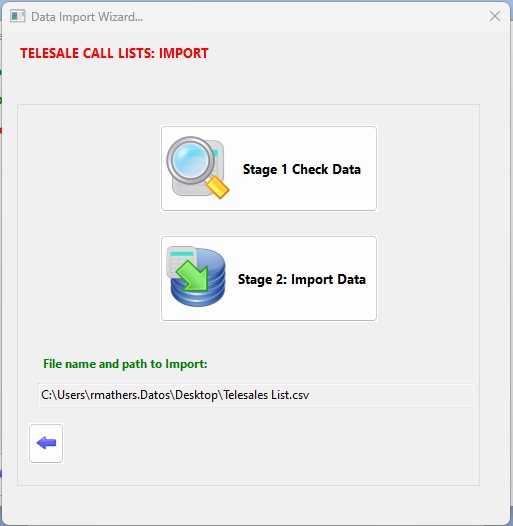
When you are ready to import your CSV file, Click the import button. Your file explorer window will open to allow you to select the file you want to import. Select the file you need and click open. You will then be prompted to confirm the import, click yes to continue or no to stop.

When you click yes, a new window will open. Here you need to click the stage 1 Check Data button. Season will check the data to make sure it is in the correct format and any codes within the file match up with existing codes within the system. If there are any issues with the data you will get an error message and you will need to correct the problem data before attempting to import. If the file is correct, you can move onto Stage 2; Import Data, when you click this button the file will be imported. When complete a pop up will appear, click ok to complete. You can close the database maintenance windows now.