How To: Customer Audit Report
To view the historical transactions/activity on customer accounts you can run the ‘Audit Report’, this will show you all of the activity that has taken place for the account in the period of time selected.
*The Audit report was updated for Season 24, if you are using Season 24 or later, skip the first section, the report shown there is no longer available.
Printing a Customer Audit Report (Season 23 and older)
To run the report follow the steps below:-
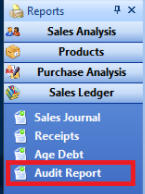
- On the reports menu, go to sales ledger > Audit report
- At the top of the report menu you will be able to choose how to output your report, either by PDF preview or printer.
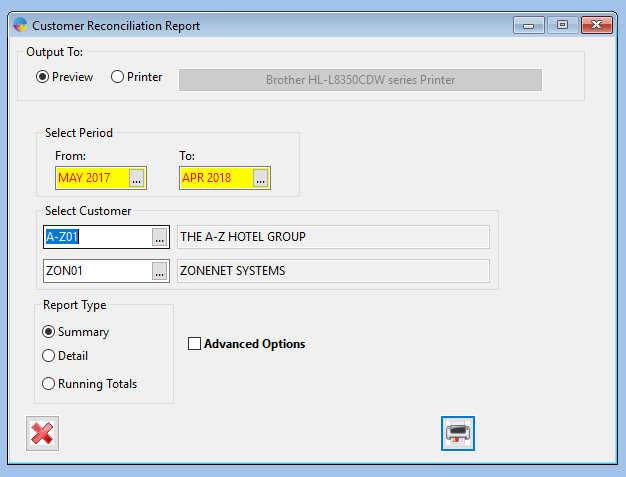
- The ‘Select period’ option allows you to choose which period you would like to run the report for.
- The ‘Select Customer’ option allows you to choose what customers to include in the report.
- The report type can be run in summary, detail or running totals only.
- If the Detail report type is selected then you will also be given the option to to print payment allocations report (this will print off detail of any allocations for the chosen period range.)
- By ticking the advanced options you can choose which rep you would like the selection to range from.
- Once you have chosen your preferences, select the print button and your report will be printed.
Using the Customer Audit Grid (Season 24 and newer)
In Season 24, the report was updated so it now shows in a grid layout rather than the on screen page view. You still access the audit grid in the same way you access the audit report, see step 1 above for where to find the grid.
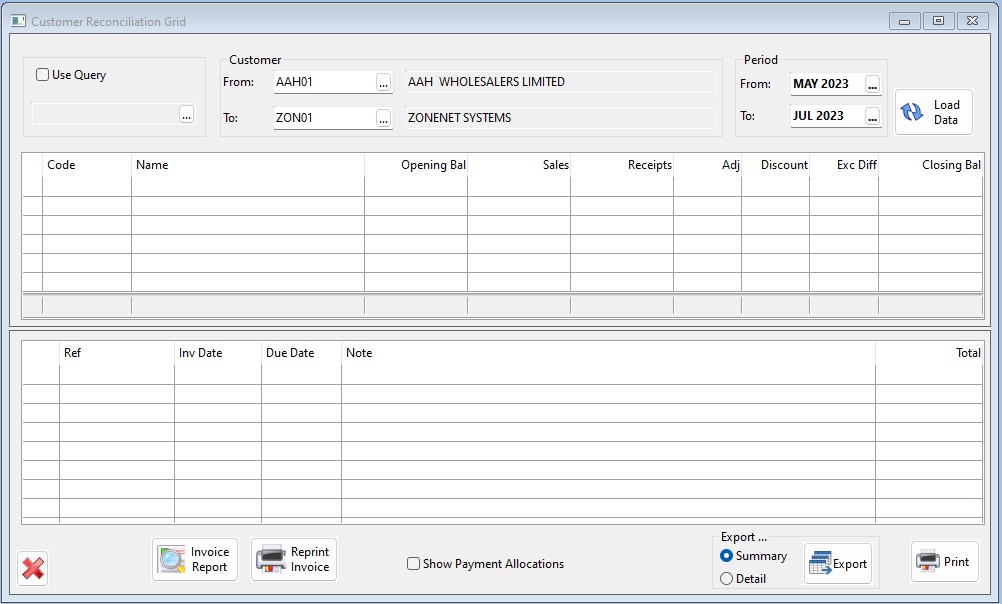
To run the report, you need to select your “From” and “To” customer codes as well as the “From” and To” for the period. When you have those selected, you can click the “Load Data” button to populate the grid with your data.
Additional Options
There are a few additional options within the window.
Use Query – This allows you to create ad add your own bespoke filter to the report. Click Here, see articles for product and customer query setup for more info on how to create those queries.
Invoice Report – This allows you to select an invoice from the lower grid and print a report showing the details of the invoice, it is not printing the actual invoice docket.
Reprint Invoice – This allows you to select an invoice line from the lower grid and then print that invoice.
Show Payment Allocations – This will show payment allocations on the lower grid along with the general receipt data
Export – This allows you to export the data to a CSV file, you have an option to select from the summary or detailed versions of the export.
Print – This allows you to print the report to printer or screen preview. When you select this option a new window will open for you to select preview or print. There is also a check box you need to check if you want to print the detailed version of the report, by default the summary version will print.