Setting up Factory Quality Control
In Season 19.3 we have added a Quality Control facility to Season Factory. When an operator completes the preparation of a customer order, the order will move to quality control before being released for dispatch.
Quality control can be directly applied to all customers or individually against customers.
To turn it on for ‘ALL’ customers follow the below steps:
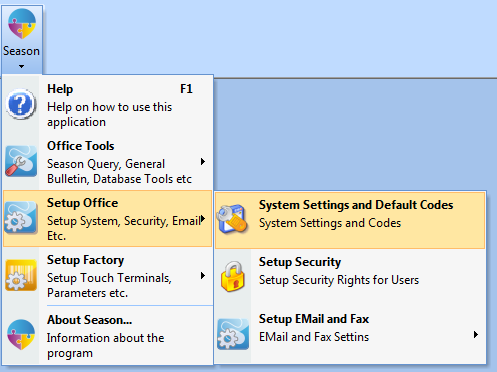
- Click on the Season icon > Setup Office > System Settings and default Codes.
2. On the System Defaults window, select the ‘System Settings > SOP > Sales Ledger > CRM > Stock’ tab
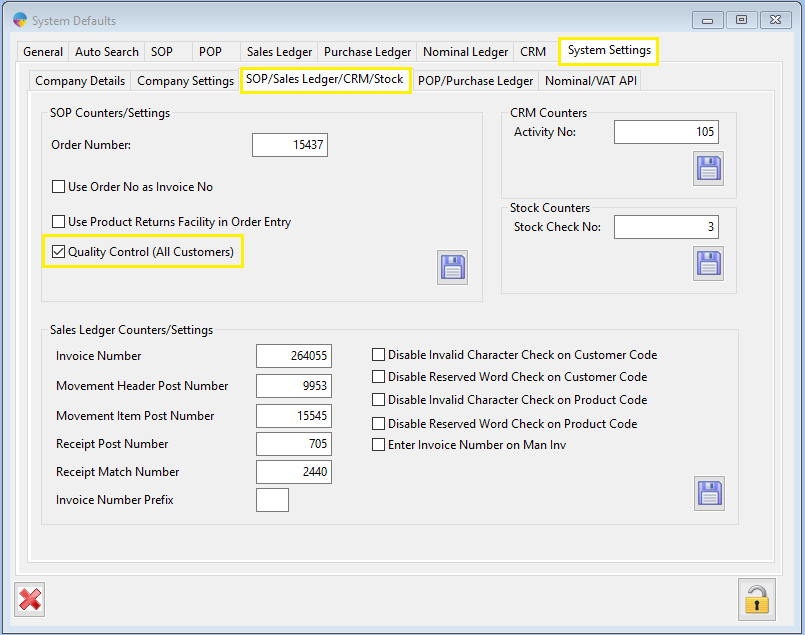
3. Tick the check box ‘Quality Control (All Customers)’
4. Click the save icon
To turn it on for an ‘INDIVIDUAL’ customer follow the below steps.
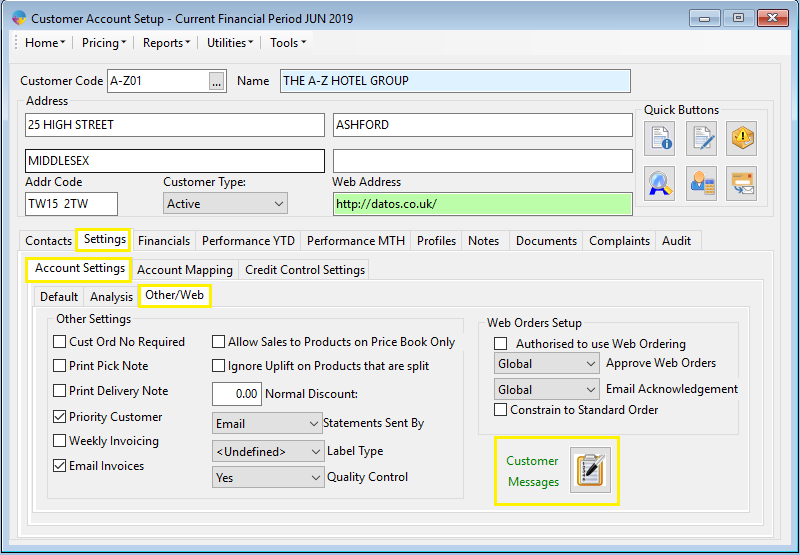
- From the operations menu go to Sales Ledger > Customer Setup
- Within Customer setup go to the Settings > Account Settings > Other/Web tabs
- In the drop down box beside Quality select ‘Yes’

Setting up quality control messages for ‘ALL’ customers.
- As with the previous step, within Customer setup go to the Settings> Account Settings > Other/Web tab.
- Click the Customer Messages button.
You will now see the customer messages window. Here you can enter what messages/questions you want to appear while processing the order for dispatch.
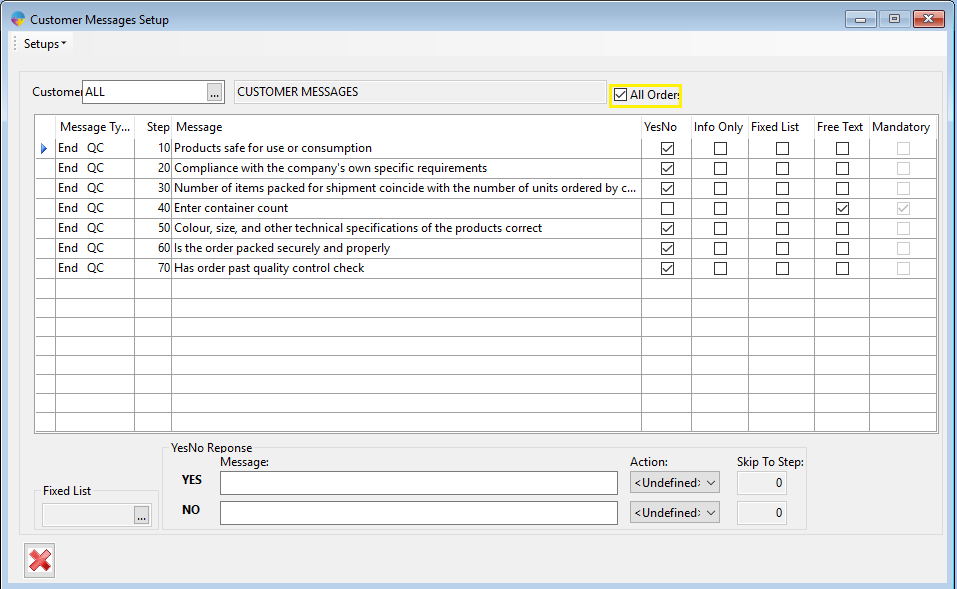
- Check the All Orders box to automatically bring up your ‘ALL’ customer. (If you do not already have an “ALL” customer set up, you will need to do so from your customer set up window. Follow this link for instruction on how to set up a new customer.)
- Select a message type, you have 4 choices;
- Start order – these messages will appear as soon as you try to confirm a product on the order during the preparation stage.
- End order – these messages will appear when you are saving your order during the preparation stage.
- Start QC – these messages will appear as soon as you enter the order at the QC stage
- End QC – these messages will appear when you are saving your completed order at the QC stage.
- Give the line a Step number, this will determine the order in which the messages appear, you can not use the same step number twice within the same set up.
- Select how you want the question to be answered;
- Yes/No – This will give the operator a choice between a yes and no answer.
- Info Only – this will just display the message, use if you want to display text but don’t need an answer.
- Fixed List – This will display a set of answer that the operator must chose from. Follow this link for instruction on how to set up fixed lists.
- Free Text – this will provide the operator with the ability to type their own answer.
- If you wish the answering of a specific question to be mandatory check the Mandatory box.
**If you are using a fixed list you will need to assign a list for that question to use. Click on your fixed list question and then click into the Fixed List box in the bottom left corner of the window. Press F4 to load your list of fixed lists, select the list you want to use and click ok.
Setting up quality control messages for ‘INDIVIDUAL’ customers.
- Follow the steps above for setting up “ALL” but instead of checking “All Orders” click into the Customer field and press F4 to load your customer list. Select your customer and click the green tick, now follow on from step 2 above.
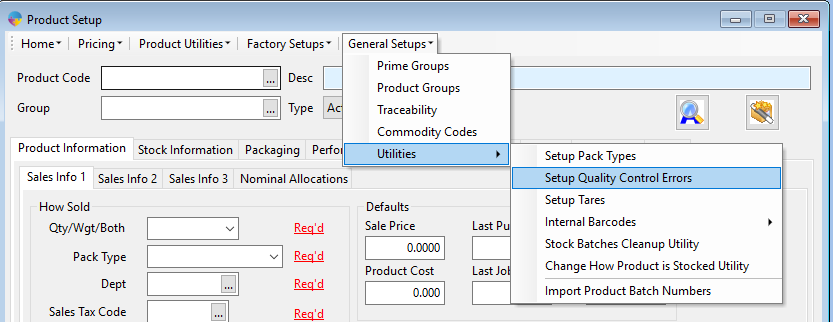
Setting up your quality control issue types.
- From the operations menu go to Product Management > Product Setup
- Within Product setup go to the General Setups > Utilities > Setup Quality Control Errors
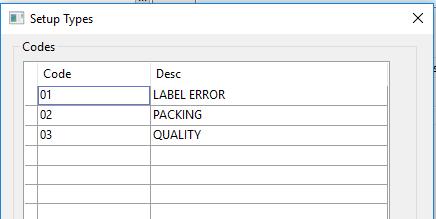
Within the set up window, click into the code field and enter a unique code for the error and then give it a description. Pressing tab to move onto a new line will save the previous one. Click the red X to close the window when your done.