How to Set Up and Use Pick Notes
Setting Up Customers For Pick Note Printing.
You can either setup individual customers to print pick notes or you can turn on pick notes for all customers within the system. Once pick note printing is turned on, after an order has been entered in Season office, the order will then move to the print pick note list within Season. The pick note will need to be printed before the order can be confirmed in either Season Office or Season Factory.
Turning on Pick Notes for Individual Customers
- Go to Sales Invoicing > Customer Setup.

- Select the customer you want to set up pick notes for.
- Go to Settings > Account settings > Other/Web.
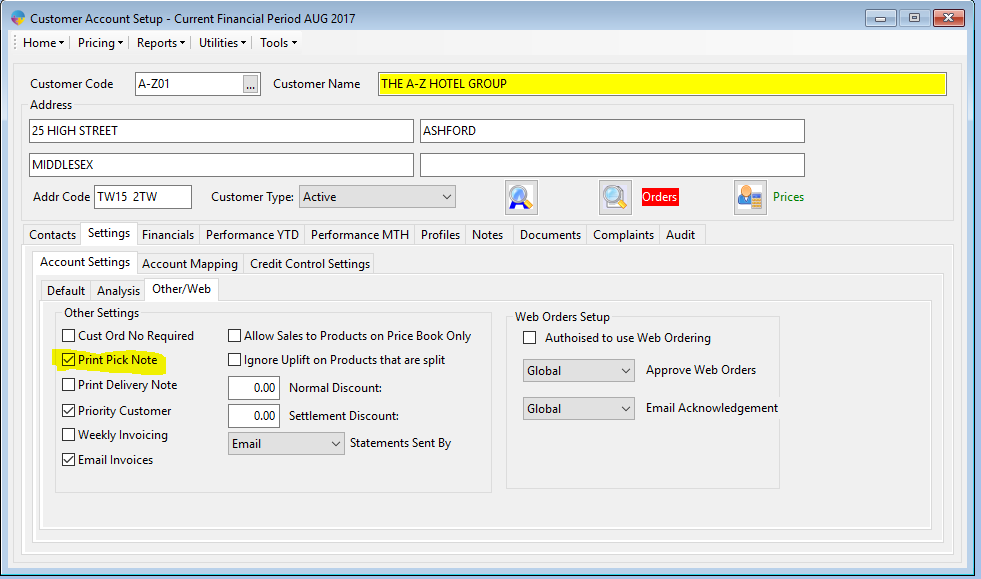
- There will be an option ‘Print Pick Note’ select the box.
- Select the save icon at the top of the screen to saver the changes.

Setting Up ‘ALL’ Customers for Pick Note Printing.
- Go to Season icon at the top of your screen -> Setup Office -> System Settings and Default Codes.
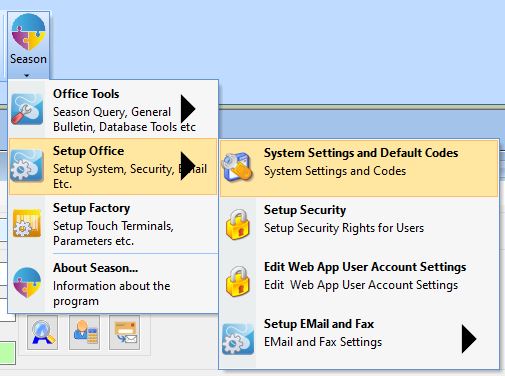
- Go to the SOP tab and below that, select the Printing tab.
- Click the lock icon at the bottom right hand side and enter in your admin/supervisor password.
- Select the check box that says ‘Print Pick Notes’
- Click on the save icon to complete the change.

Once this setting is applied, all orders for every customer will go to the print pick note stage after the order has been submitted.
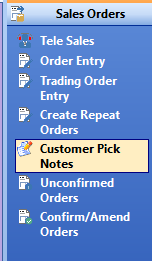
Printing Pick Notes
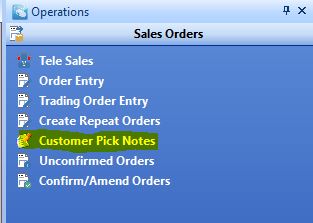
- On the operations menu go to Sales Orders -> Customer Pick Notes.
- This will open up the ‘Pick Notes List’ where you will see a list of pick notes that are ready to be printed.
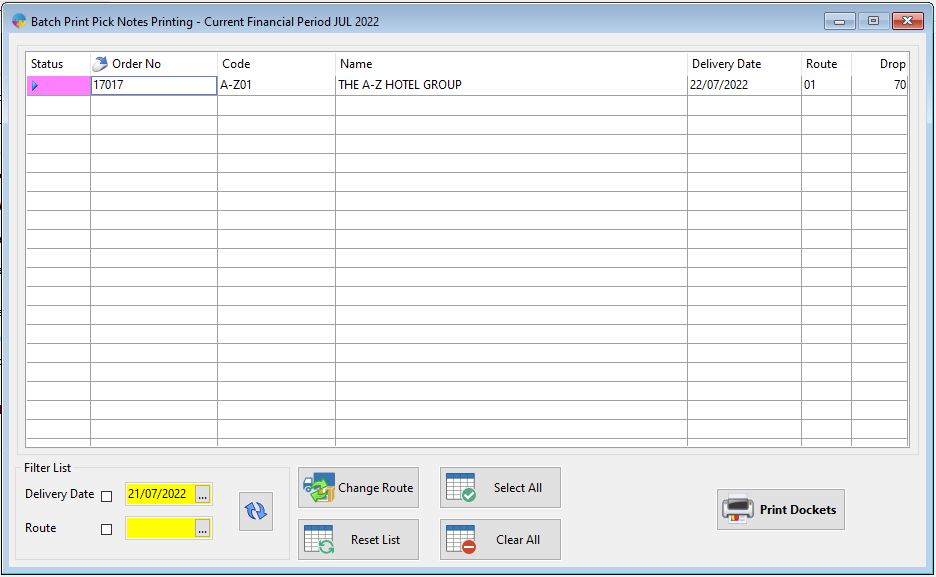
- To print a pick note, you can select one or more orders, the line will highlight when they have been selected. When you have selected the orders you need to print, Click the button to Print Dockets.

- A new window will appear giving you the different print options
- Screen – The will give you a screen preview of the pick note/s.
- Printer – This is the option to print the pick notes from your chosen printer. Click the settings button, highlighted red in the above image, to open the printer selection window.
- File – This option is visible here but the pick notes are not compatible with the file print option.
- When you have selected the print method, you will need to select either Normal or Departmental.
- Normal – This will just print standard pick notes. 1 pick note for each order.
- Departmental – This option will split the orders selected into their different departments so if a customer has ordered some veg and some beef, the beef products will be split from the veg products and a pick note will be printed for each department. You can set Season up to send those departments to specific printers if you have printers set up in each area of your stock rooms.
- For more info on setting up departments, please see this guide.
- Click the OK button to print your pick notes. You will be prompted to confirm if the pick notes have printed, if there has been any issues with the print, click no and the orders will remain on the pick note list. If everything has printed correctly, click ok to confirm and the orders will be removed from the list.

Other Options
Resetting a Pick Note so it can be reprinted.
- On the Operations menu, go to Sales Orders > Customer Pick Notes.
- When the pick note list opens, you will see a Reset List option at the bottom. Click on the ‘Reset List’ button to bring up the options you have for resetting.

- You will have 3 different options to use when resetting pick notes to the list. You can reset any unconfirmed or partially confirmed order, you can not reset to the pick note list once the whole order has been confirmed.
- Order – This will allow you to reset a specific order or a series or orders. If it is one order you can enter the same order number into the From Order box and the To box. If it is multiple, you can put the first order number in the series into the From Order box and the last number in the series in the To box.
- Delivery – This allows you to select a single date or a date range.
- Route – This option allows you to choose a single or series of route.
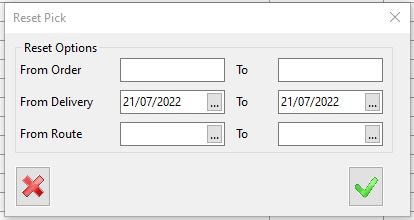
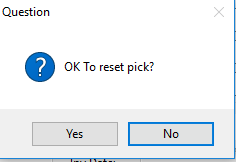
- When you have entered your reset criteria, click the green tick. You will be prompted to confirm the reset of the orders. Click Yes to proceed or No to cancel the reset.
- As long as the orders you have chosen to reset are not fully confirmed orders, you should now see the pick notes listed and available to print again.
Changing the Route/Editing An Order from the Pick Note List
If you need to change the route or make any adjustments to the order, you can do so from the pick note list.
Changing the route
At the bottom of the pick note print window, there is a button to change the route.
- Highlight the order you need to change and Click this button.

- When the next window appears, you have the option to select a new route from the menu. Click the little box with the 3 dots inside to open the list of available routes. Enter a Drop Seq if required and click the save button complete the change.

Editing the order
- To edit an order, you need to highlight the order you want to edit and then right click the line. A pop will appear, click it to open the order. From here you can make changes to the order, Click submit or press F2 to save the changes.
