How to Setup a New Label Code in Season
Label codes need to be set up in Season Office to tell the Factory software (Touch/Factory/External Factory Software) what label to print for which product. This article will show you how to set up the label codes within Season Office.
Setting up the new Label Code
To set up a new label code or edit an existing label codes details,
- Go to Season Icon -> Factory Setup and click the unlock button at the bottom right hand side of the window to unlock with your supervisor/admin password.

- Click on the ‘Label Setup’ tab under the ‘Setups’ tab. This will take you to the label setup grids.
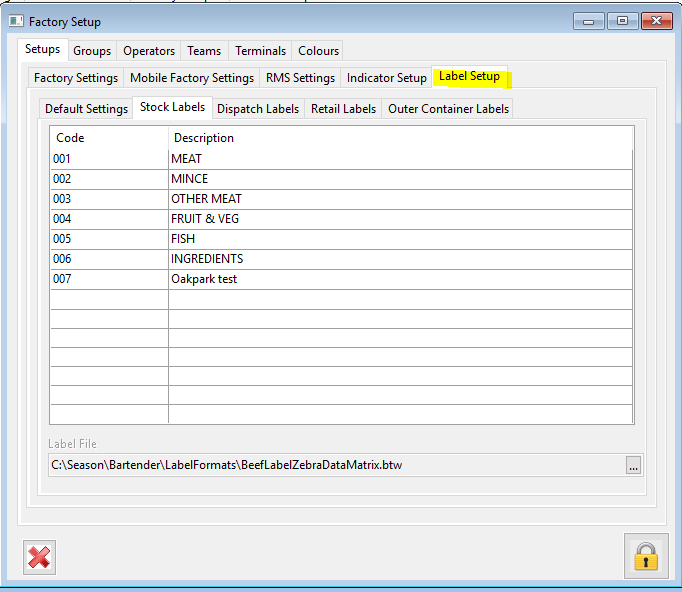

- You can select which labels you want to amend or create. For example ‘Stock Labels’.
- In this grid you can amend the description on a current label.
- To amend the label file (the label format file that you have designed), select the label code on the grid and click on the popup box in the ‘Label File’ field to select the new label file. (N.B. is it important that, when using Commander to print the label, the path to the file be local to the server that runs Commander. e.g. c:\… rather than s:\…)
- To set up a new label code, navigate to the end of the grid and select a new line. Enter in the Code and Description and press tab to finish the line. You can then set the ‘Label File’ for this format in the ‘Label File’ field. This will be the path at which the label is stored on your sever/main PC. This path must be accessible on the terminal from which you wish to print from.
To see how to assign labels to a product, Click Here
To see how to setup and assign label templates to products, Click Here