How to import a CSV file for Customer Receipt allocations
From Season version 19.1 onwards you can now import a csv file to automatically allocate your customer receipts to the correct transactions. See below for details on this.
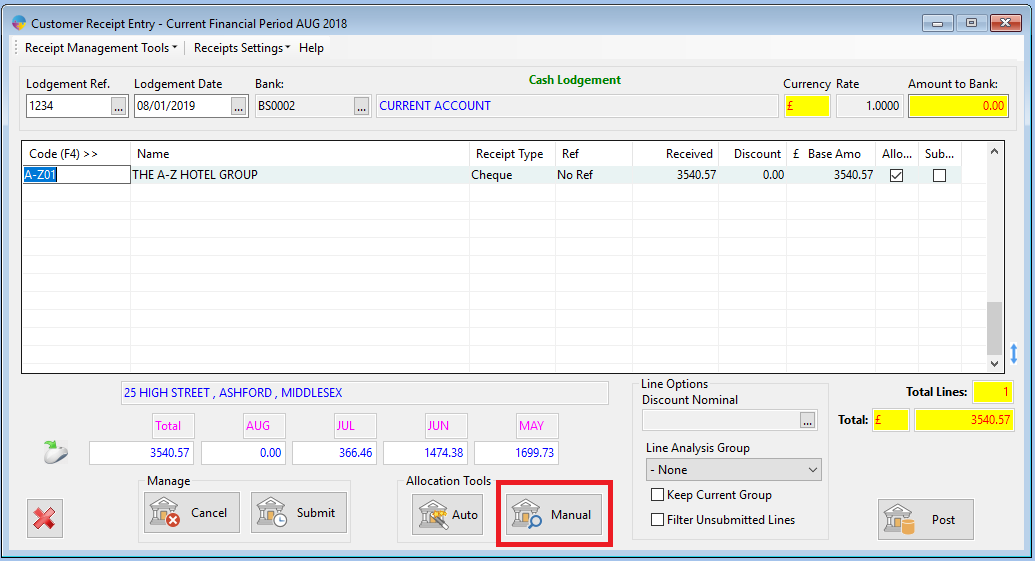
- In the Operations menu, go to Sales Ledger -> Receipts Customer, to bring up the Customer Receipt Entry program.
- Enter the Lodgement detail and select the customer this allocation will be for, and enter the amount received
- Select the ‘Manual’ button at the bottom of the screen – this will show any outstanding invoices on the customers account.
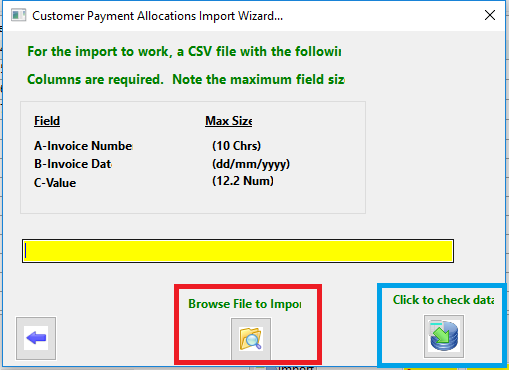
- At the bottom of the Manual Allocation screen there is an ‘Import File’ button.

- The import file button will allow you to select a file containing customer payments – click on ‘Browse file to import’
- Once you have selected your file, click on the ‘Click to check data’ button – this will check that the data is in the correct format to be imported.
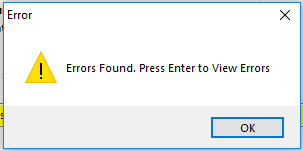
- You will be asked to confirm the import, click ‘Yes’

- If there are any errors, the file will not import, and a screen will appear showing what the errors are – hovering over the field highlighted red, will give you more information on the error.

- Once the file has imported successfully, the payments should be allocated correctly, and you can save the allocation.
