How to do a Stock check within Season Office
1 . Go to Product Management > Stock Check.
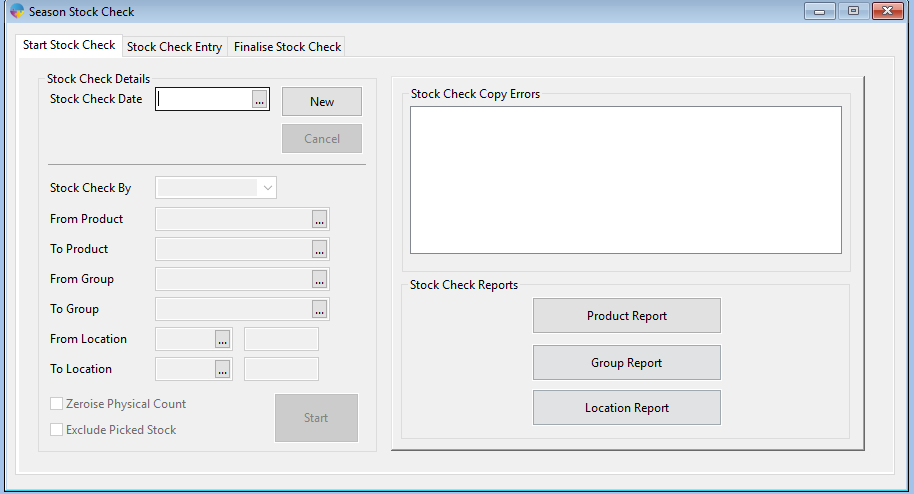
2. Ensure the date field is blank then click new this will load a stock check for today’s date in the system.

3. Select how you want to run the stock check i.e. by product or group or location. (see above screenshot for example)
4. Select options for stock check if need be:
– The Zeroise physical count will remove computer count of stock per product i.e. so the pickers using the stock check sheets don’t see a computer count (i.e. what the system thinks it has in stock).
– Exclude picked stock ( this will exclude stock that has been confirmed onto sales orders though has not yet been posted as an invoice)
5. Our advice is to post all invoices prior to completing a stock check usually End or beginning of each week/Day as needed.
6. Then click Start box. (This will now calculate system stock for your selections)
7. Click on the middle Tab ‘Stock Check Entry’
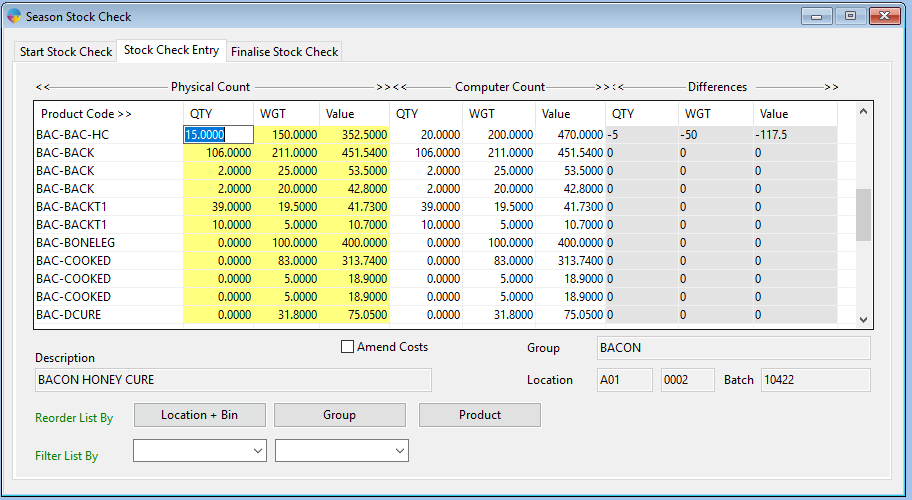
8. The yellow columns can be changed to enter in your Physical stock that has been counted by the stock check personnel:
9. Any amendments are recorded on the Right hand side under differences:
10. Once the stock check values have been entered (Yellow Columns) for actual physical counted stock, click on the ‘Finalise Stock Check’ Tab. In here you can click ‘Update’ to Update your system stock and print any additional reports i.e. stock check differences / Stock Valuation reports
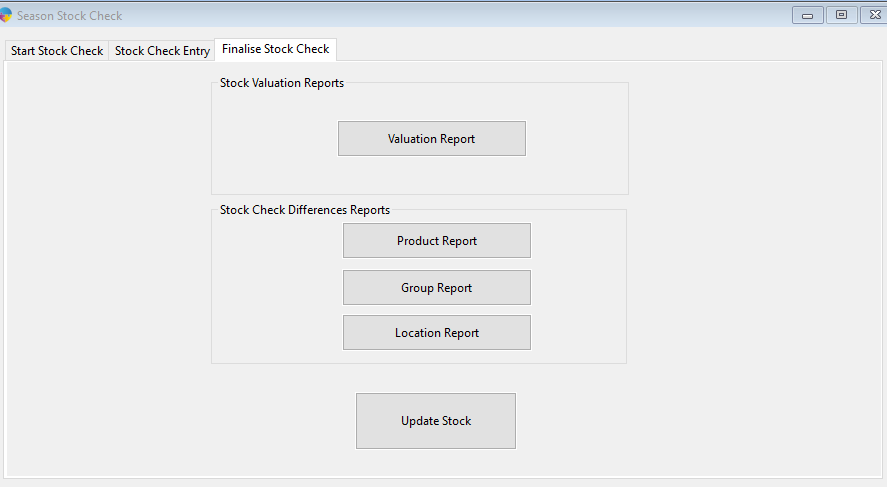
*Please note even after a stock check report has been completed we record all updates in the system.*
To access a stock check so you can print reports from that stock check again or view what was recorded click on the date field as below or press F4 and select the stock check date of your choice:
Upon double clicking on your selection you can then re-print any reports as needed.