How to: Setup Product Groups
Every product you set up within Season Office needs to be assigned a group. For example you may have a group for Meat, one for Fruit and one for Veg.
Creating Product Groups
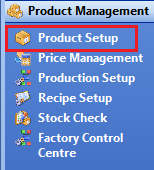
- Open Product Setup, Product Management > Product Setup.
- From your product setup window, Go to General Setups > Product Groups.

- You should now have your product group setup window on screen. If you have opened the group setup window with a product selected it will open with that products product group data on display. To create a new group you need to start with a blank window. Press F5 to clear any existing data from view.
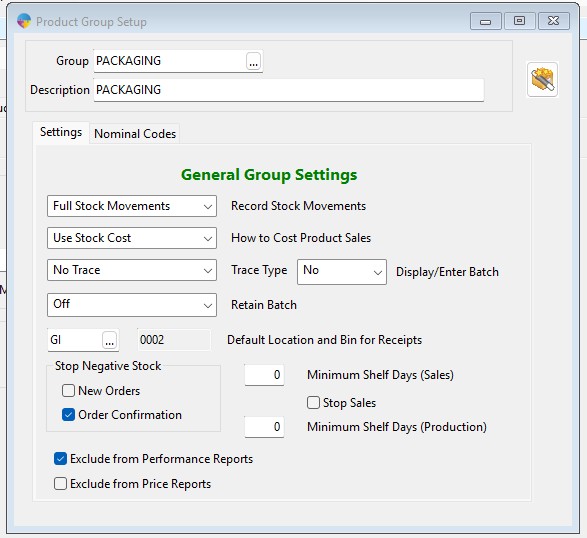
- With the group setup window blank, enter a name and a description for the group. You then need to choose how the group is going to work. The options are as follows;
- Record stock movements – This is simply record or don’t record movements depending on your requirements. If recorded you will be able to look up each products movement history, ins/outs/transfers etc.
- How to cost product sales – This will either be product cost which uses the products default product cost found on the sales info 1 tab of product setup or Stock cost. Stock cost will use the cost of the specific batch being sold be it directly booked in from a purchase order or if it was produced from a job.
- Trace Type – This will be set to no trace if you are not recording traceability information. If you are recording it then you will need to select the relevant trace profile from the list. For more info on setting up trace profiles, Click Here.
- Retain Batch – You have 3 options here;
- Off – When confirming products at goods out, Season will prompt the Operator to Select a batch to take the stock from. **Option to retain batches from you stock batches list will be hidden as well**
- Manual – When confirming products at goods out, Season will prompt you to select which batch you want to retain, once selected, this batch will be retained until all stock has been used from it.
- Automatic – If only 1 batch is present, Season will automatically retain that batch, if there are multiple, Season will prompt you to select which one you want to retain
- Default Location/Bin – This will be the default location used for stock receipts, select the required location from the available list. For more information on setting up locations/bins, Click Here
Additional Options
Minimum Shelf Days – This option allows you to set a number of shelf days that once it is past that point, it is going to warn the operator. You have options to set this warning for Production Jobs and Sales orders.
Stop Sales – By checking this box, a product below the shelf life minimum will not be allowed to be used.
Stop Negative Stock – This will stop the product from being able to go into negative stock. You have 2 options; New Orders, this will not allow you to put a product on order if the order amount would make the stock total negative. Order Confirmation, this will stop a product being confirmed if you dont have the stock to cover the order totals.
Display/Enter Batch – Only visible when traceability is turned off for the product group. When set to “yes”, it will allow a batch number to be manually entered when confirming an order (only in Season Office, this does not affect Season Factory).
Exclude from Performance Reports – When checked, the product group will be excluded from any performance reports in Season, for example the gross margin report.
Exclude from Price Reports – When checked, the product group will be excluded from pricing reports in Season, for example, customer pricebook report.
How to setup a new Product Group using the copy Wizard
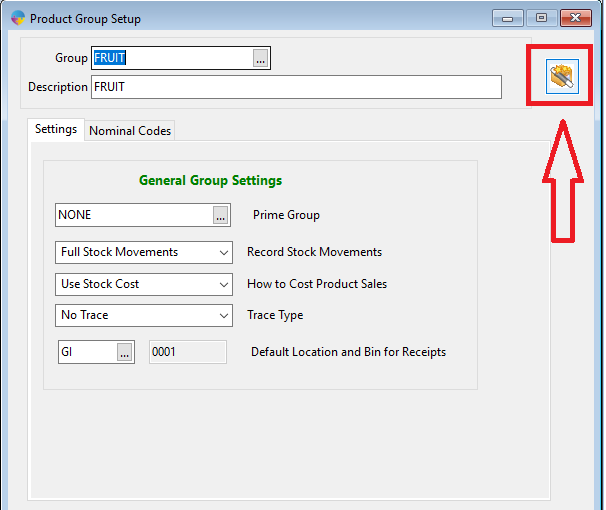
- In the Product Group Setup window click on the wizard icon in the top right of screen.
- This will then open the ‘Copy Product Group Wizard’.
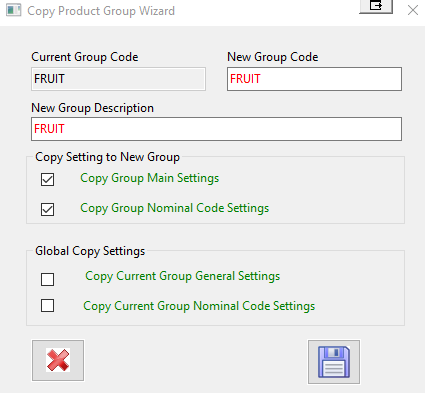
- In the ‘New Group Code’ field enter in the new code that you want.
- In the “New Group Description” field enter in the new description.
- Under the heading ‘Copy Setting to new Group’ you have the option to copy the main settings and nominal code settings from the current group to the new group. Tick either of the check boxes if you want this to be done.
- Under the heading ‘Global copy settings’ you have the option to copy the general settings and nominal code settings from the current group to the new group. Tick either of the check boxes if you want this to be done. ***Please note this is a global copy and will update the settings on all product groups***
- Press the save icon to create the new Product Group