Using the Comms Manager
The Comms Manager Module was introduced into Season at the release of version 19.2. The Comms Manager can be integrated into your existing VOIP phone system and allows the calling of contacts directly through Season.

To access the Comms Manager, Click the Comms Manager Icon found on the menu bar along the top of your screen.
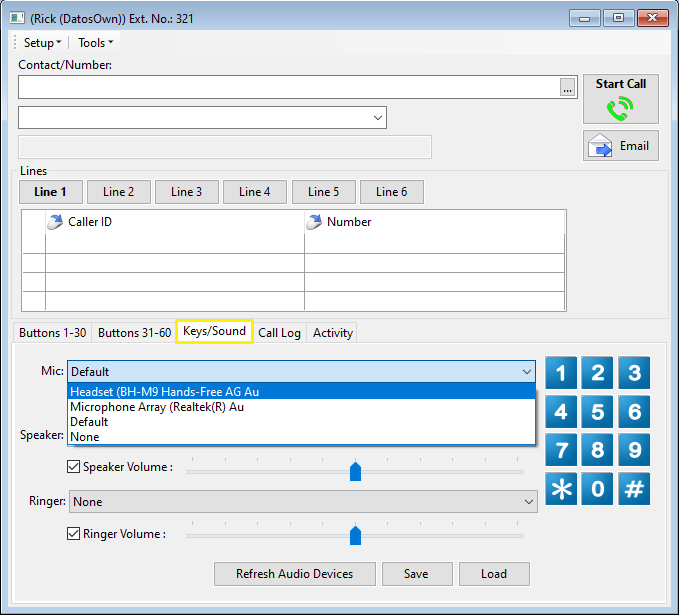
Linking your Headset into Season
- Make sure your headset is connected to your computer via bluetooth.
- Click the Keys/Sound tab found on the main Comms Manager window.
- Select your headset from the drop down menu for the Mic and Speaker. You may want to keep your ringer set to your PC speakers. * If your headset does not appear, click the refresh audio devices button, if it still does not appear, recheck headsets connection to PC*
- Adjust volumes by moving the sliders up and down.
- Click Save.
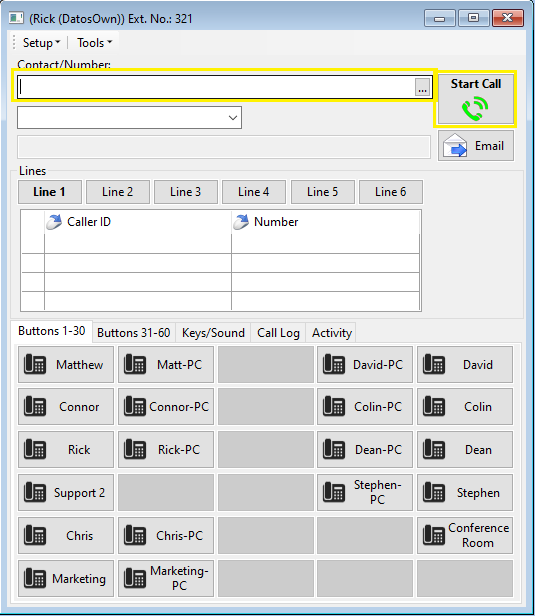
Making a Call
- Click into the contact number box and press F4 to load your contact list.
- Select the contact you wish to call (you can press F4 again here to use the advanced search)
- Click the Start Call button to make your call.
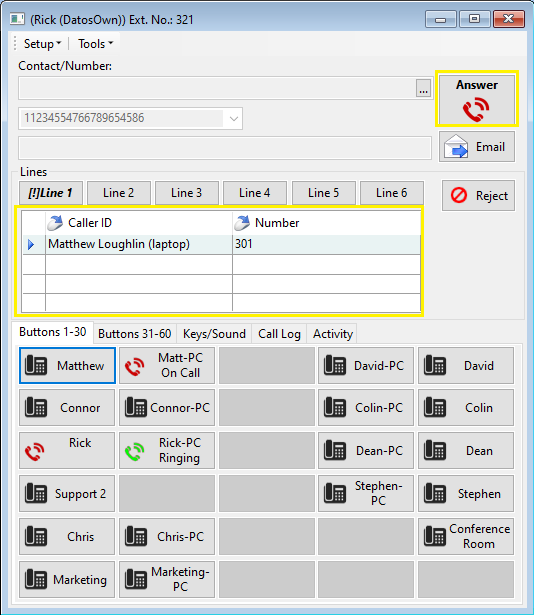
Receiving a Call
- Your Comms Manger will start to ring when you have an incoming call, displaying the caller ID in the grid for you.
- Click the Answer button to accept the call or the Reject button to reject it.
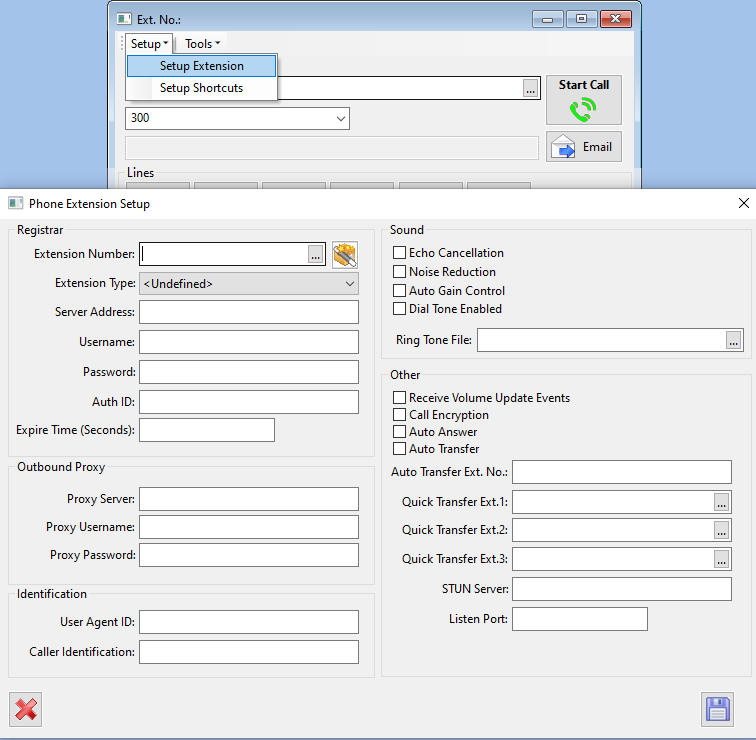
Setting up Extensions
- From the Setup drop down menu, found in the top left corner of your Comms Manager window, select setup extension.
- Move to step 3 if you are setting up a new extension. If you want to load an existing extension you can click into the extension number field and press F4 to open the search.
- Enter an extension number into the Extension Number field. This must be unique and not already be in use for another extension.
- Fill in the remainder of the form, your own VOIP company (or the contact you are setting up, if it is external) should be able to help you with these details if you are unsure.
- When everything required is filled in, click the save icon to complete the set up.
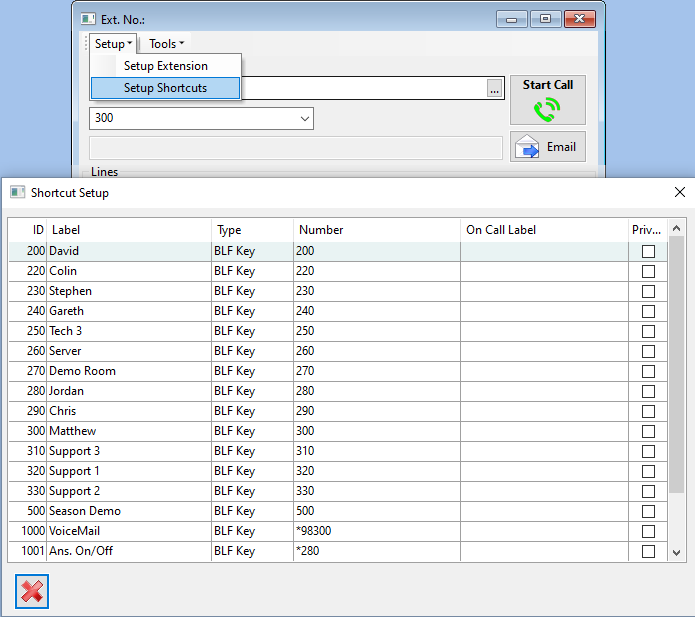
Setting up your shortcuts
- From the Setup drop down menu, found in the top left corner of your Comms Manager window, select setup shortcuts.
- You will now see a grid, showing all currently set up shortcuts. Scroll to the bottom of your list and add a unique ID number into the first available blank line.
- Next chose your shortcut Type (BLF will generally be used for internal numbers and speed dial for external)
- In the Number column, enter the phone number for external contacts or the extension number for internal contacts.
- Add an On Call Label, this is what will display on your shortcut button if this contact is on call. (If left blank, “On Call” will be displayed by default)
- If you want the shortcut to only be displayed for your username, check the Private box. No other Season users will be able to see this contact.
- Tab onto a new line to save your changes and click the red X to return to your Comms Manger window.
Adding and Removing shortcut buttons
On the main Comms Manager window you have 2 tabs, Buttons 1-30 and Buttons 31-60. When you click either of these tabs you will see a grid of buttons. To add a shortcut to a button..
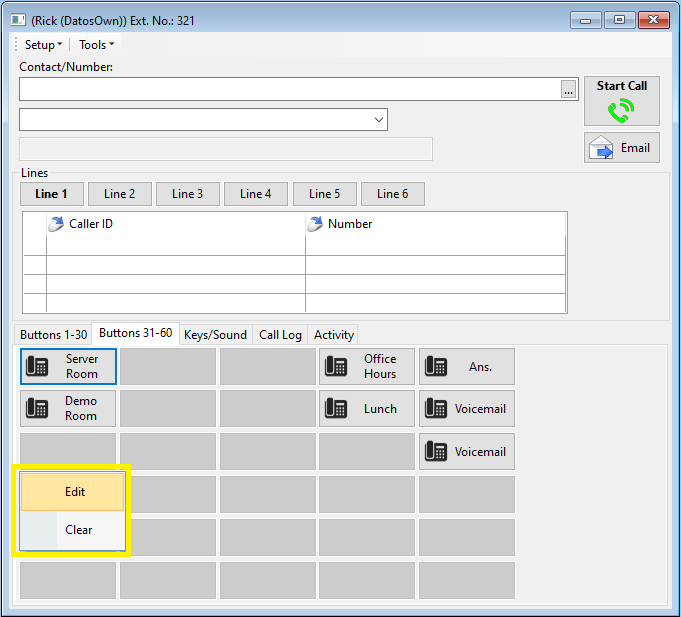
- Right click a blank button and click Edit.
- A list of shortcuts will open, select the contact you want to add the shortcut for and click the green tick.
- Your blank button will now be replaced with the contacts name.
*To remove shortcuts, follow step 1 above but click clear instead of edit. This will clear your button, freeing it for a new shortcut to be added.
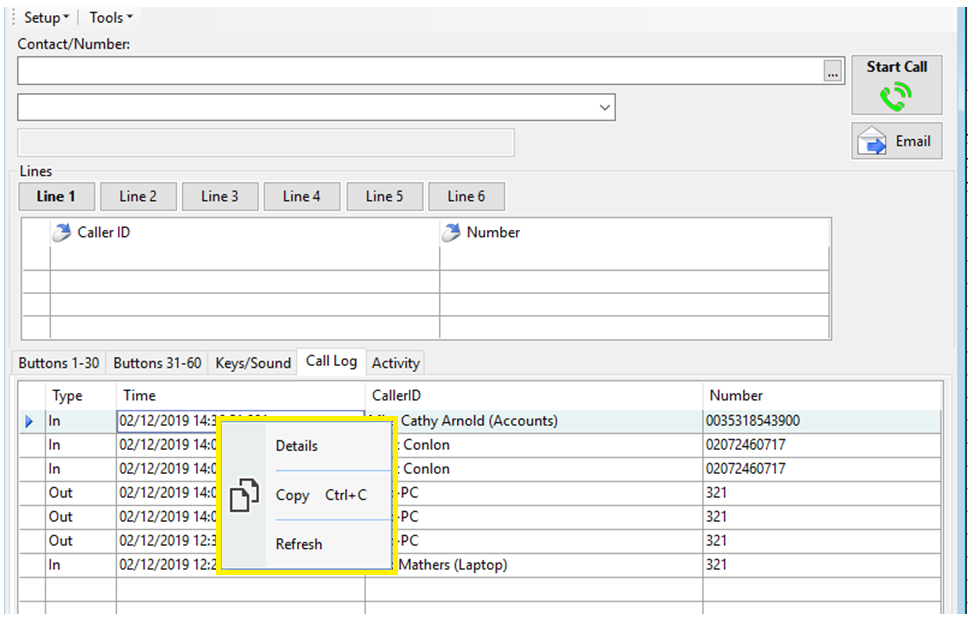
Call Log
On the main Comms Manager window you have a Call Log tab. Here you can view your call history. You can right click on a line, clicking details on the pop up menu will automatically open the customer set up window within Season with the contacts company information loaded.