Changes to Area Code Setups
With the release of Season 19, how Area codes are set up has changed. If you are using Season version 18.1 or earlier then use this guide.
Setting up an Area Code
First you need to open your system settings. Click the Season icon, found on the main menu bar along the top of your screen. Select Setup Office then System Settings and Default Codes.

When your System Defaults window opens, Click on the General tab then the Area tab.
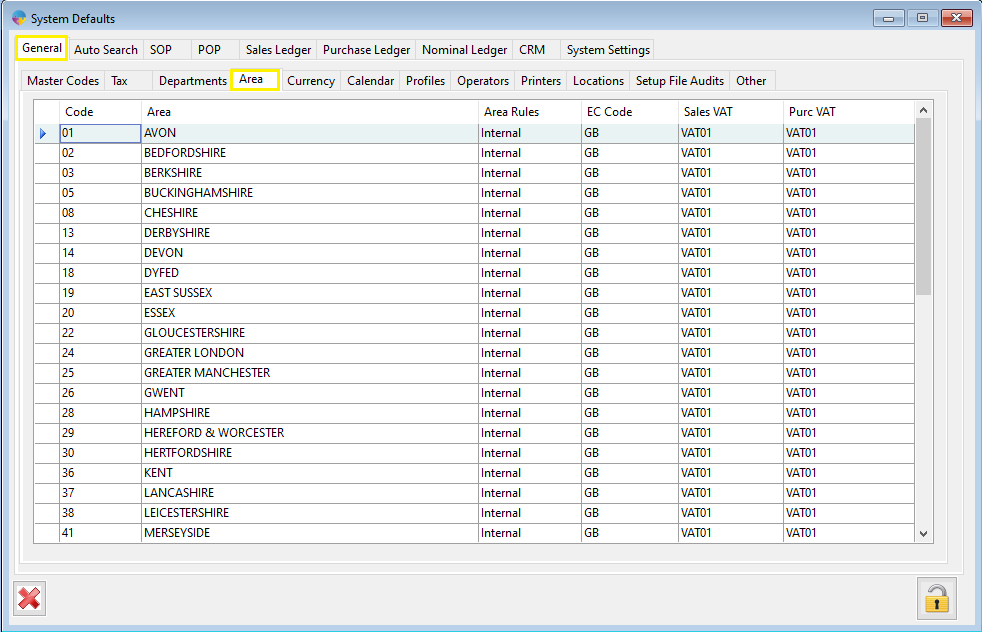
Adding A New Area Code
- On the first available free line, enter a code into the Code field.
- Next, in the Area column, give your area code a name/description.
- Chose one of the area rules for your area
- Internal – Use this for an areas that are within your own country, ie. if you are a UK company, any UK area will be internal.
- EC – Use this for any area which are within European Countries
- Non-EC – Use this for any areas which are not internal or EC.
- Enter an EC Code for your area, ie. IE for Ireland, GB for Great Britain.
- Next choose with VAT code you want to use for sales(sales VAT) and purchases(Purc VAT) within the area your are setting up.
*If you have set up an EC area, you need to make sure the VAT code you are setting against the area is set up to allow EC sales/purchases, for a guide on how to check which VAT codes are set for EC sales/purchases, follow these links. Sales / Purchases