How to use Customer CRM
The customer CRM allows you to manage Customer Complaints and Credit Control.
Customer Complaints
These instructions cover how to manage existing complaints. For more info on entering complaints, click here.
- Go to Sales Ledger > Customer CRM.

- To view open complaints, select the “complaints” option, select the user (your own users should be selected by default) and then click the ‘Refresh’ button.
- To view complaints by another user, use the drop down menu to select another user and select refresh.

Additional Options
- Up to Date- Allows you to filter complaints up to a certain date.
- Complaint Type- When this is selected you can filter by complaint type from the drop down menu.
- List Priority Only- This filter will show priority complaints only.
- Action Only- This filter will show complaints to be actioned by the current user
- Auth for Credit- This will list the complaints authorised for credit.
Managing Complaints
- To manage a complaint, select the complaint, right click and select ‘Complaint Management‘.
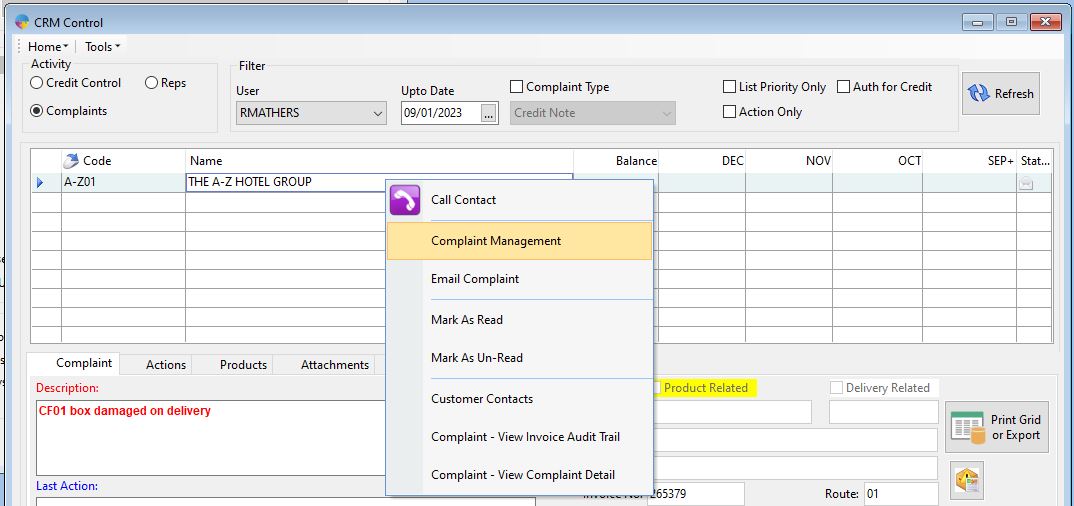
2. This will open the complaint entry.
3. The ‘add Action’ button allows you to add an action to the complaint.

4. You will need to select an activity type from the drop down menu at the top of the window and also select the relevant activity type check box on the right side of the window. Enter any notes you have in the activity note section and click the save icon to complete the complaint. Completing the complaint will remove it from your outstanding complaint list.
Activity Type
- New Activity – This is to enter a new activity or note to the complaint.
- Authorise Credit– This will authorise a credit note to be created for the associated invoice
- Cancel Complaint- This allows you to cancel the current complaint.
- Complete Complaint- This option completes the complaint.
Other Options
- Complaint Report Centre – You can run the complaint report to see an overview of complaints, outstanding or completed. Click here for how to run the report.
- Customer Compliant Profile – Similar to the above report option but less detailed. Click here for more info on how to run this report.
Credit Control
To manage credit control:
- Change the Activity type to ‘Credit Control’

- You can choose to filter this information in different ways:-
- Due Date- you can select a certain due date and only see what is due up until that date
- Contact Date- For customers that have a contact date setup for credit control, you can filter to only show customers who need to be contacted up to the selected date.
- Rep- This will allow you to filter customers for one selected sales rep only.
- Credit Status- This will allow you to filter the customers bases on the credit status that is set for them.
- Beyond Credit- This allows you to filter only customers that have gone beyond their credit limit.
- Filter Ageing- This will allow you to filter customers up to a certain amount of months or a date overdue.
- When you have your selected filters in place, click the Refresh button to load the data into the grid.
Additional options:-
-
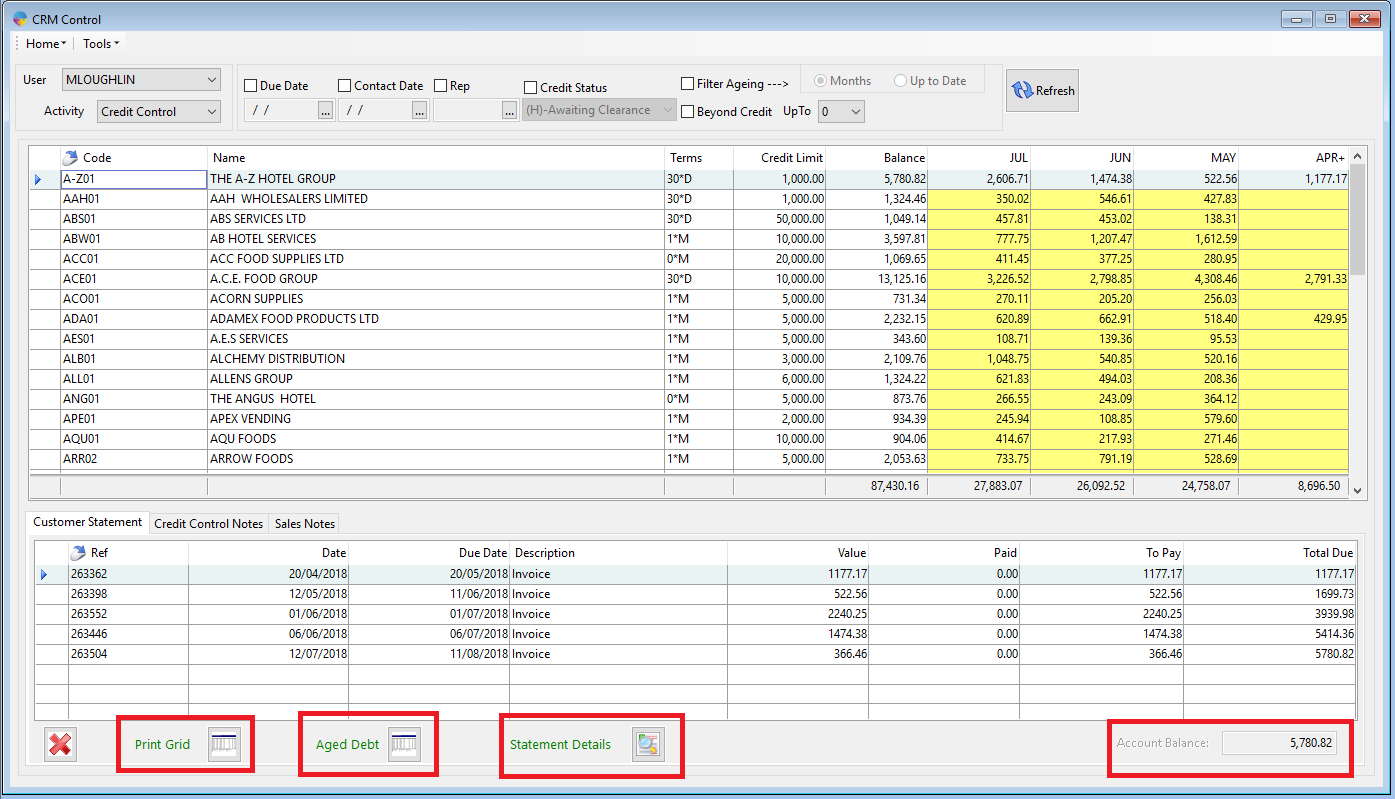
- Print Grid- This will allow you to print off the current information in the grid.
- Aged Debt- This will allow you to print an age debt report for the currently selected customer.
- Statement Details- This will bring up the statement for the currently selected customer.
- Account Balance- This shows the current account balance for the selected customer.
On Right Click

When you right click one of the grid lines you have the options shown above.
- Call Contact – If you have you phone system integrated with Season you have the option to call the customer directly from the CRM grid.
- Customer Contacts – This will prompt a little pop up box showing you the contacts details held in Season for the customer selected.
- Extended Ageing – This prompts a pop up window showing the customers monthly debt breakdown.
- Print/Email Statement – These options allow you to direct print or email your customer their statement from the CRM grid.
Notes
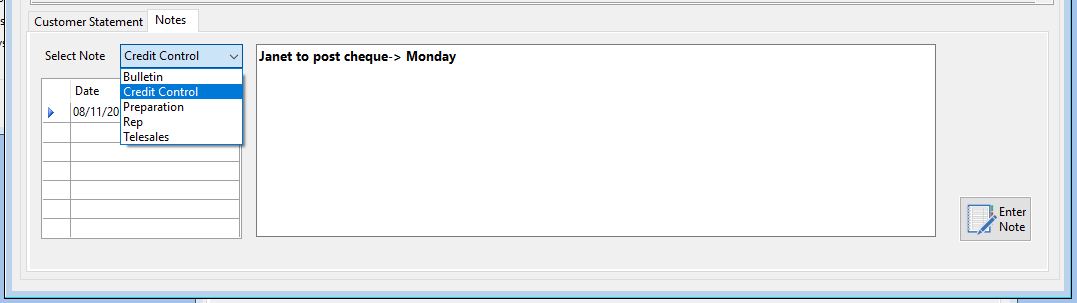
On the Lower half of the grid you will see a couple of tabs. If you click on the note tab you will have the option to enter specific notes against the customer accounts. If you are entering a credit control note, you will notice there is an option to select a credit status. This option allows you to update your customers credit status directly from the note entry window rather than having to specifically load the customer account and make changes to it.

Reps
To use the CRM rep functions;
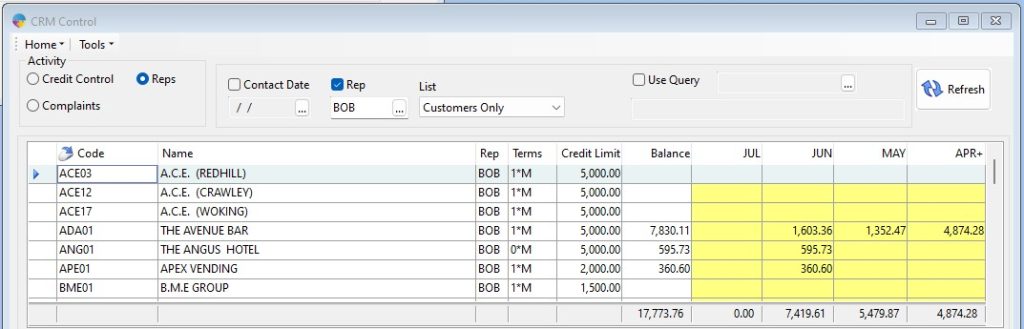
- Change the Activity type to ‘Reps’

You can choose to filter this report in different ways:-
- Contact Date – This allows you to filter the list down to a specific contact date. This uses the next contact date that you can add when entering notes
- Rep – This allows you to filter the list down to just 1 specific reps customers
- List –
- Customers Only – This will show only active customers
- Prospects Only – This will show only customers set up as prospects
- Customers + Prospects – This will show both active and prospect customers
- Use Query – This allows you to add a bespoke filter you have created to the report. Check the box and select the query you wish to use. For more info on how to create queries, Click Here, see guides for product and customer query setup.
When you have selected your criteria, Click the Refresh button to load the data into the grid. You will see the Reps customers listed with details of their financials.
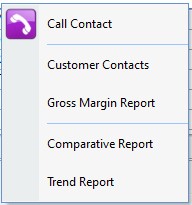
When right clicking on a customer via the upper grid, you get a few options to choose from;
- Call contact – If you have the comms manager module for Season, this will allow you to call the customer directly from Season.
- Customer contacts – This will open a new windows displaying all contact information for the selected customer
- Gross margin report – This will open the gross margin analysis grid, automatically filtered to the customer you have selected on the CRM grid.
- Comparative report – This will open the comparative analysis grid, automatically filtered to the customer you have selected on the CRM grid.
- Trend Report – This will open the trend analysis grid, automatically filtered to the customer you have selected on the CRM grid.
Additional Options
On the lower half of the CRM rep window you have tabs for Sales Notes, Price Book and Complaints.
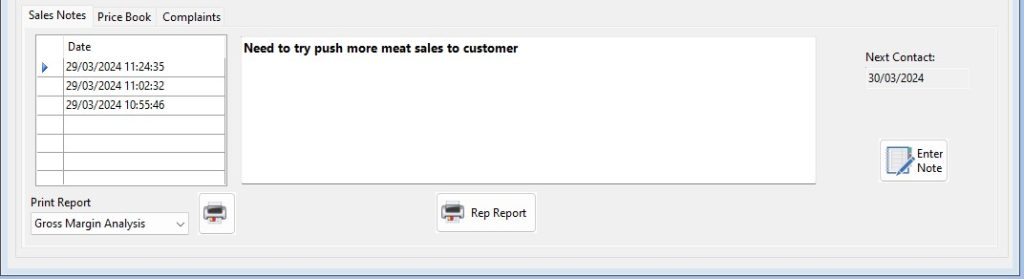
Sales Notes;
Here you can view any existing sales notes for the customer selected on the grid on the upper half of the window. You can also create new notes by clicking the Enter Note button on the right side of the window. When entering the notes you will be able to add future contact dates. As mentioned above, that date can then be used when filtering your rep report.
You also have a print button in the bottom left along with a drop down menu. You can select to print either the gross margin, comparative or trend report from here as well.
Finally there is the rep report button found bottom middle of the window. This allows you to print a report showing the details you can see on the upper grid.
Pricebook;

Here you can view the pricebook of the customer you have selected on the upper grid. You can also edit the prices and margin on the pricebook products from this screen. You are not able to add or remove products from the pricebook via this window.
Complaints;
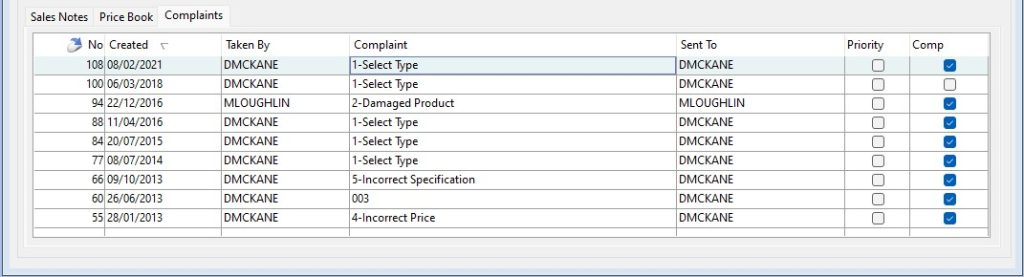
Here you can view the complaints that have been enter for the customer you have selected on the upper grid. You can right click on any complaint listed and you will have the options, Complaint management and Complaint – View Complaint Detail.
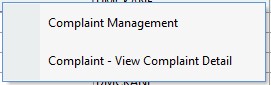
Complaint Management – Opens the complaint entry window where you can manage the complaint. Add additional detail to the complaint or complete whatever action is required and complete the complaint.
Complaint – View Complaint Detail – This will open the complaint report window, automatically filtered to the specific complaint that you have selected on the grid. This allows you to print the complaint report to view the full detail for the selected complaint.