How to Setup and Email Statements in Season office
Setting up a Customer for Emailing of Statements
You will need to ensure that your Email settings are setup on your PC. Click here to see how this is setup.
Setting up the customer contact to receive Statements via email
- Ensure that a contact has been setup.
- Ensure that the ‘Statements’ checkbox is ticked as shown below.
- Enter in a valid email address in the email address field, as shown below.

Setting up the customer to receive Statements via email
- Ensure that Statements Sent By is set to ‘Email’, as shown below.
- Now save the changes to the customer by pressing F2, or the save button at the top.
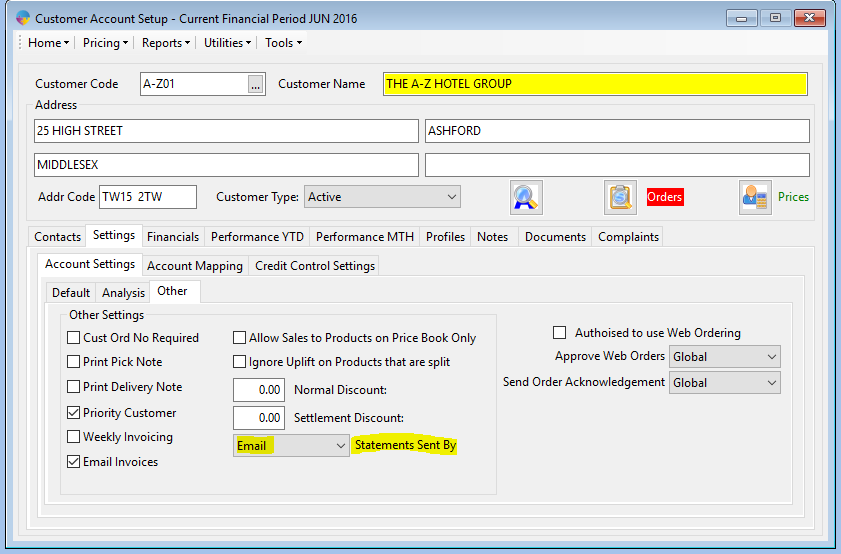
This customer will now be setup to Email Statements, so this process has to be followed for any customer you want to email statements to.
Emailing Statements
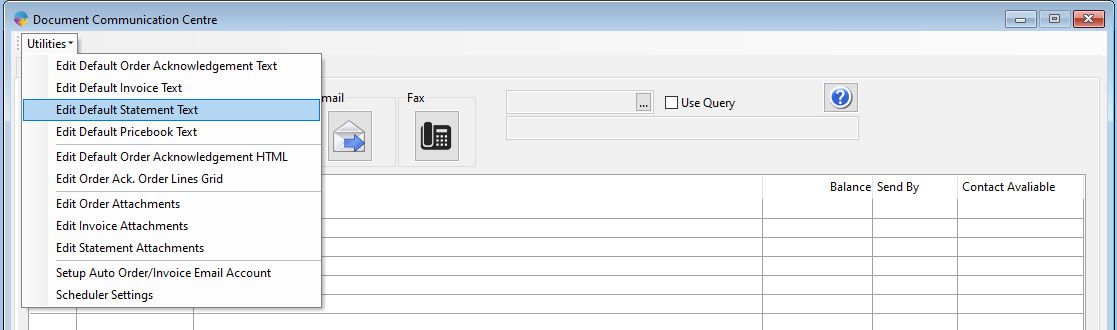
- Go to the Document Communication Centre, as shown below. Sales Ledger->Document Communication Centre.

- In here you can edit the default Statement text for the email as shown below.
- Click on utilities.
- Click on Edit Default Statement Text.
- Enter your admin password.
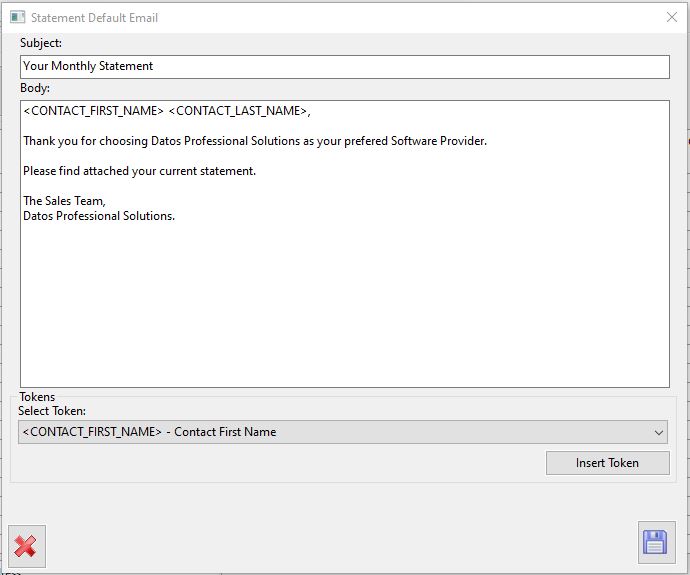
- This will bring up the screen shown below.
- In here you can edit the default text for the subject and body of the email.
- Save the changes by clicking the save button.
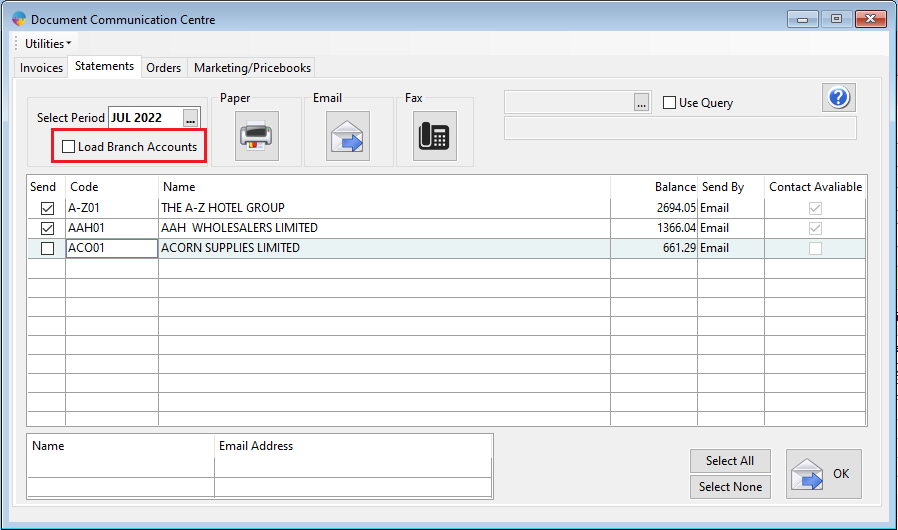
4. To send the statements within the document communication centre, follow the below steps.
- Click on the statements tab.
- Then click on the Email statements button (This will load a list of all customers setup to email statements)
- You now need to select the customers that you want to send statements to, or select all.
- Then click the OK button to send the statements via email.

Branch Statements
You also have the option to email branch statements. By clicking the checkbox highlighted below, Season will load all branch and normal accounts (no head offices) when you load your list of emails to send.