How To: Print A Route List Report
The route list report gives you the ability to print a report for 1 or more routes that breakdown the drops on the route. It also includes questions for drivers to fill in information like start/end times or mileage totals.
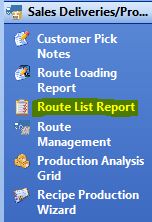
To open the route list report window, select the Route List Report option found the the Sales Deliveries/Production tab on your Operations Menu.
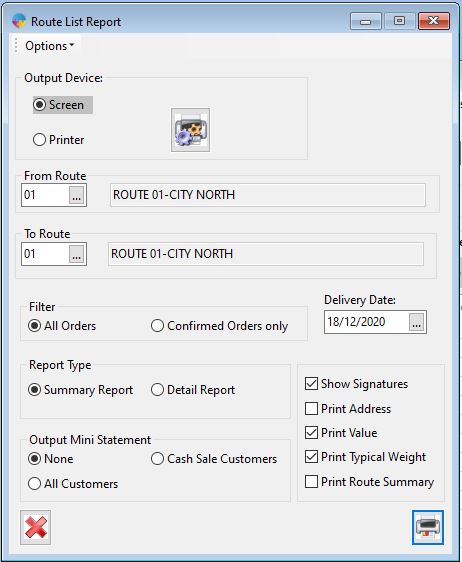
Report Options
- From/To Route – This allows you to select which routes you want to include on the report
- Delivery Date – Select the date you are looking to view the route list for
- Filter, All Orders/Confirmed Orders Only – If running for all orders, the report will include confirmed and unconfirmed orders. Running confirmed orders only will only include orders already confirmed.
- Report Type, Summary/Detailed – Summary will print a less detailed report, while if ran in detail the report will include more information.
- Output Mini Statement, None/Cash Sale Customers/All Customers – A mini statement will be displayed for customers depending on your selection of none/cash sale/all.
Additional Options
- Print Address – If selected the report will show the delivery address for each drop
- Print Value – If selected the report will display the value for each order
- Print Typical Weight – If selected the report will display weight totals for the order based on your products typical weight settings
- Print Route Summary – If selected the report will print a summary showing number of orders along with the total value of all the orders
When you have selected from the above options and are ready to run the report, Select your method of printing (Screen/Printer) and Click the printer button found in the bottom right corner of the window.
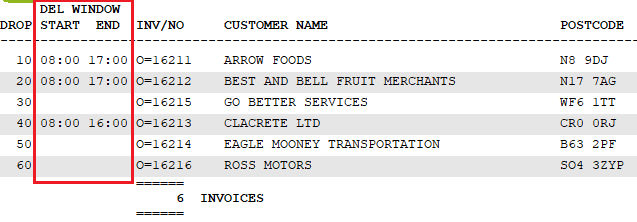
Delivery Windows
A new section has been added to the report to display delivery windows for each customer. These are set up against the route, for more info on adding delivery windows, *link*.
Options Menu
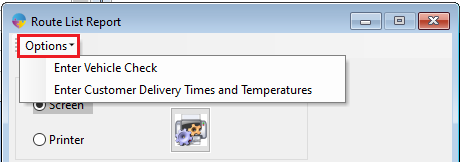
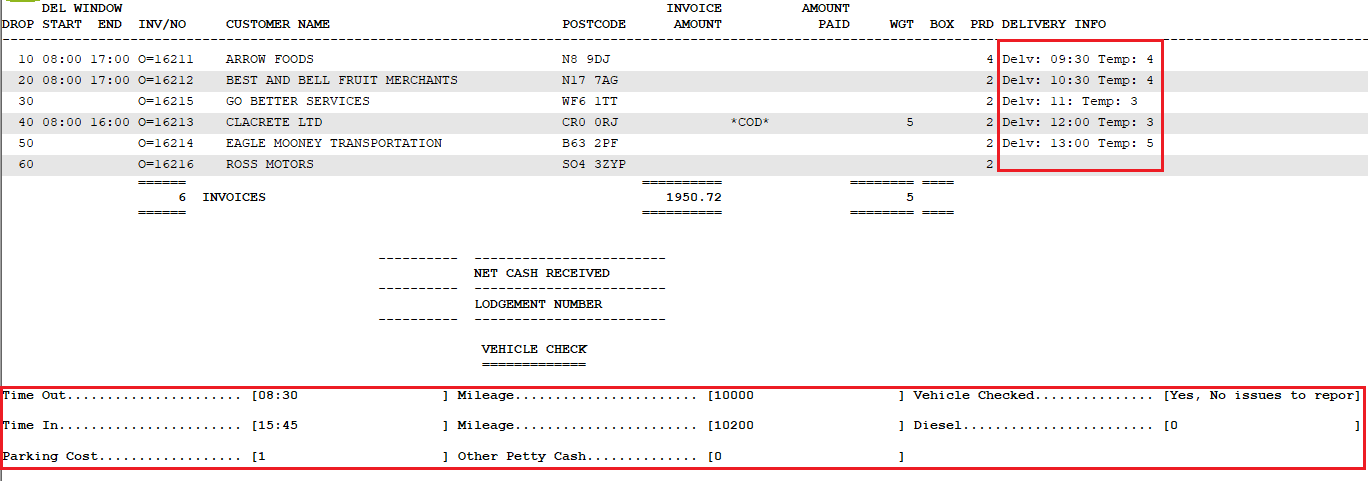
When the drivers have returned from delivering orders, they will have filled in the questions and also delivery times and temperatures while they were out. If you want those details to be stored within Season you need to enter that information into the system.
Enter Vehicle Check – This is where you will enter your vehicle messages responses (These messages are set up by the end user, Click Here for more information)
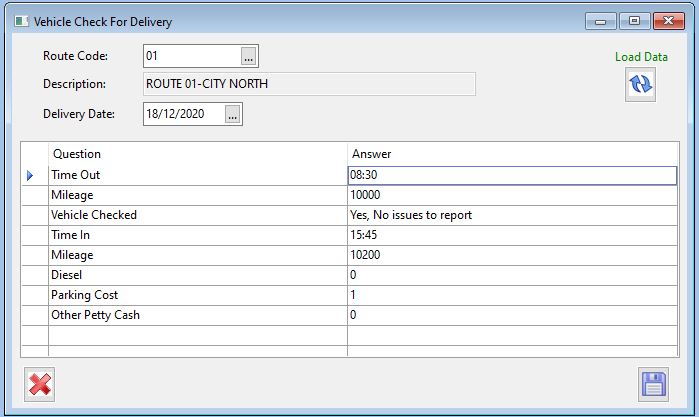
Select the route code you are completing the answers for and the date the route was completed. Click the Load Data button to load the questions into the grid. Fill in the answers and Click the Save button when your finished.
Enter Customer Delivery Times and Temperatures – This is where you will enter the delivery time and temperature for each delivery.
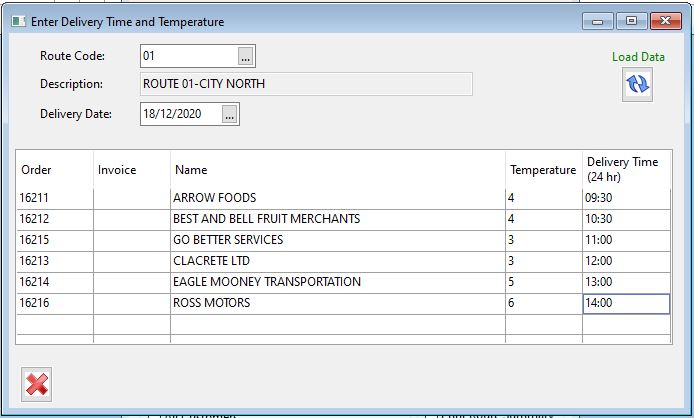
As above, Select the route your entering the details for and select the date the route was completed. Enter in a temperature and delivery time for each order. Once complete, just close the window.
*Now you have filled in your vehicle messages answers and delivery time and temperatures, the route report will now display that information when printed from Season.*