Creating A BACS payment file
Most, if not all banks will have a facility allowing you to upload a file containing details of payments to be made so you don’t have to make them manually. Season has the ability to produce these files for you. There is also the ability to do this for SEPA payments as well as BACS, for more detail on SEPA payments, follow this LINK.
Setting up Season so it can produce your payment file.
The first thing you will need to do is specify where the created file will be saved.
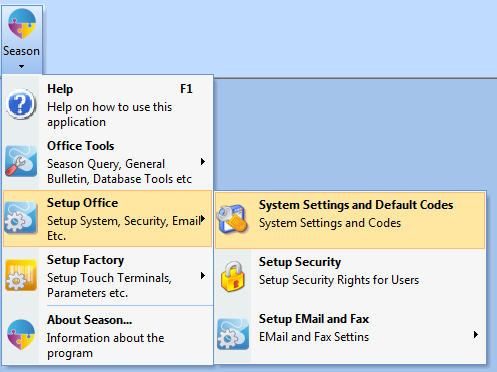
Go to the Season system settings. Main Season menu > Setup Office > System Settings and Default Codes.
In the System Defaults you will want to go to the General tab and then Select the Master Codes tab. You will need to unlock the window with your system admin password. Click the lock icon found on the bottom right of the window to enter the password.
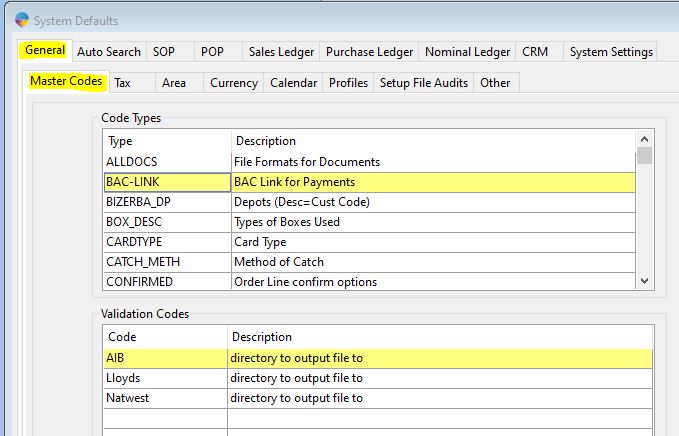
Once unlocked you will need to find the BAC-LINK code. This is where you will put your file save location. It will be the file path to the folder you want the file to be created in. E.G C:\Users\datos\Desktop\BACS. Enter the file path into the Description field beside the relevant code for your bank.
We have the following exports available;
- Lloyds TSB, Code = “Lloyds“
- Natwest, Code = “Natwest“
- AIB, Code = “AIB“
- Bank of Ire, Code = “BOI“
- Bank or Ire (UK), Code =”BOIUK“
- Santander, Code = “Santander“
Setting up Suppliers For BACS payments.
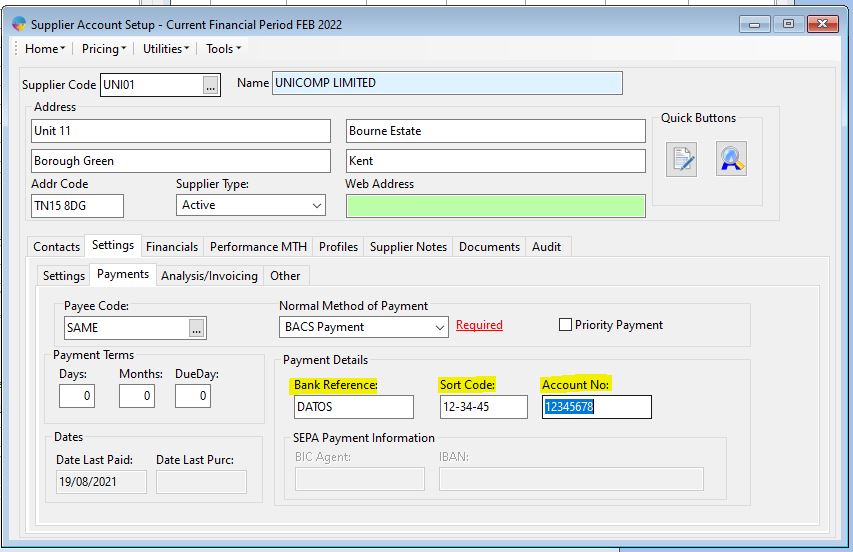
You will need to make sure to add the payment information to your supplier accounts, a reference, their sort code and their account number. Go to Supplier Setup > Settings tab > Payments tab. You can also set the Normal Method of Payment to BACS as well but this is more for reference and wont stop you creating the payment file if BACS is not the selected payment method.
Creating the Payment file.
To create your payment file, you first need to enter payments into Season. For more detail on how to create payments follow this LINK.
When you have some payments entered, to create the file, open the supplier payments window and click on the BACS menu found at the top left of the window and select Produce BACS Payment File.
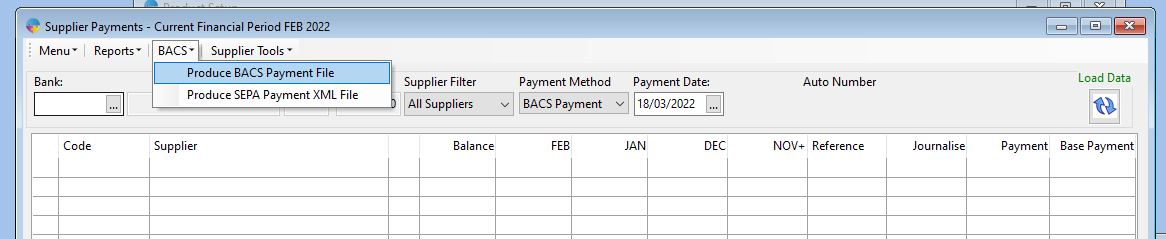
A new window will then pop up for you. Here you will need to select which bank link code you want to use, AIB, BOI etc. This is the code you would have set up with your save location in the initial part of this guide. Once the bank link code has been selected, click into the BAC REF field and press F4 to open a list of your payments.
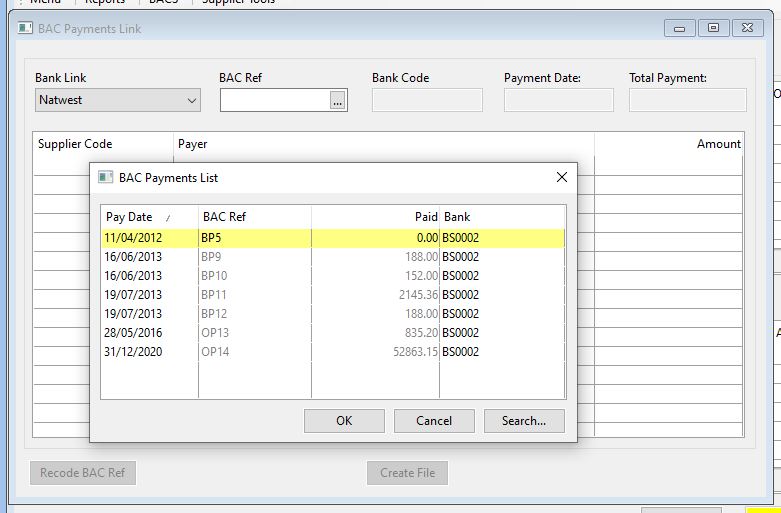
Select the payment you need to create the file for from the list and click the OK button. You will now see the payment breakdown on the grid on screen.
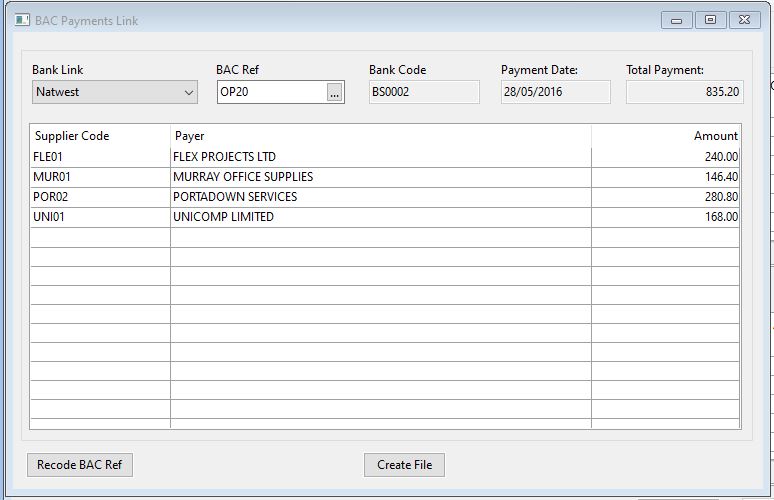
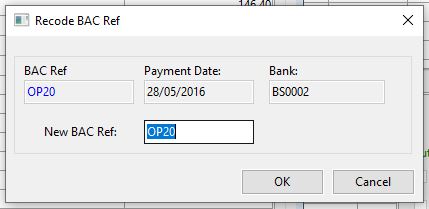
There is a Recode BAC Ref button in the bottom left corner, this will allow you to change the REF number of the payment. When clicked a new window will appear, enter your new reference in the box and click ok to save the change.
To create the file, click the Create File button. You will be promoted to confirm the creation of the file or not. Click Yes to continue or No to cancel the creation. Navigate to the folder that you specified in the original part of this guide and you will find your payment file saved there.

You can now take the created file and upload to your bank.