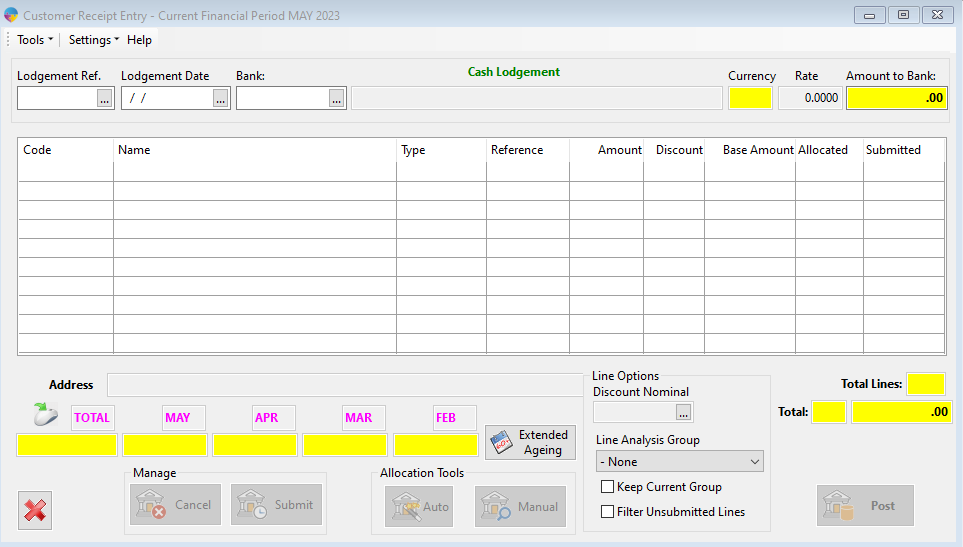
Features of Customer Receipt Entry
1.In the Operations menu, go to Sales Ledger -> Receipts Customer. To bring up the Customer Receipt Entry program.
2.In the Lodgement Ref box put in the lodgement from the drop down box which will auto fill the information.
If you are making a new Lodgement Ref follow these steps if not skip to part 3.
While doing the steps always click TAB to get to the next part until finished for the Entry to actually save.
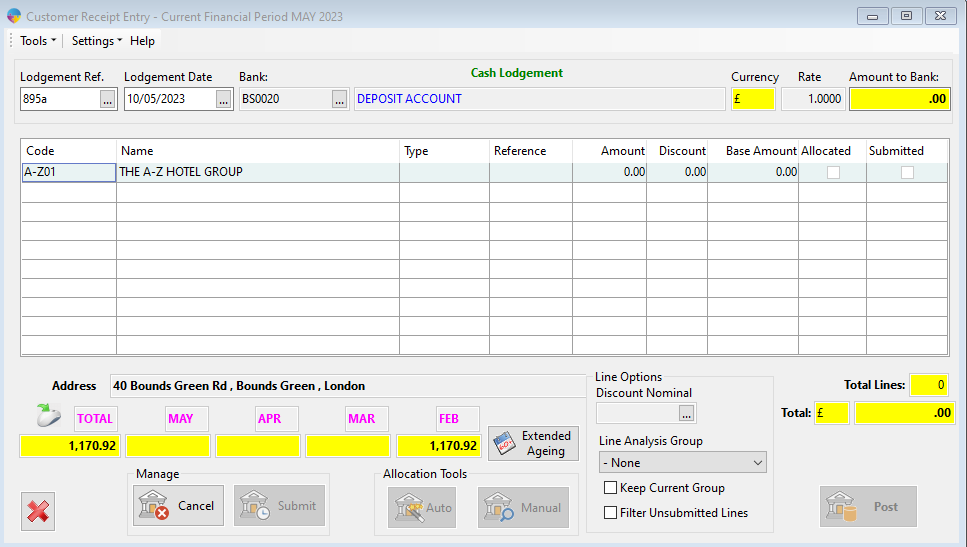
- Place in a brand new lodgement Ref in the the box titled “Lodgement Ref“
- Place in the Date for the Lodgement at “Lodgement Date“
- choice your bank in the drop down box called “Bank“
- The Cash Lodgement and Currency as well as Rate will be auto filled
- You can choice to put a limit in the “Amount to bank” but you can also leave it blank
- When done press TAB and if you have done it right you should be ready to start putting in Customers.
- If the Lodgement was done by mistake you can remove it by clicking “Cancel” at the bottom left corner it will delete the Lodgement and all data that it carried.
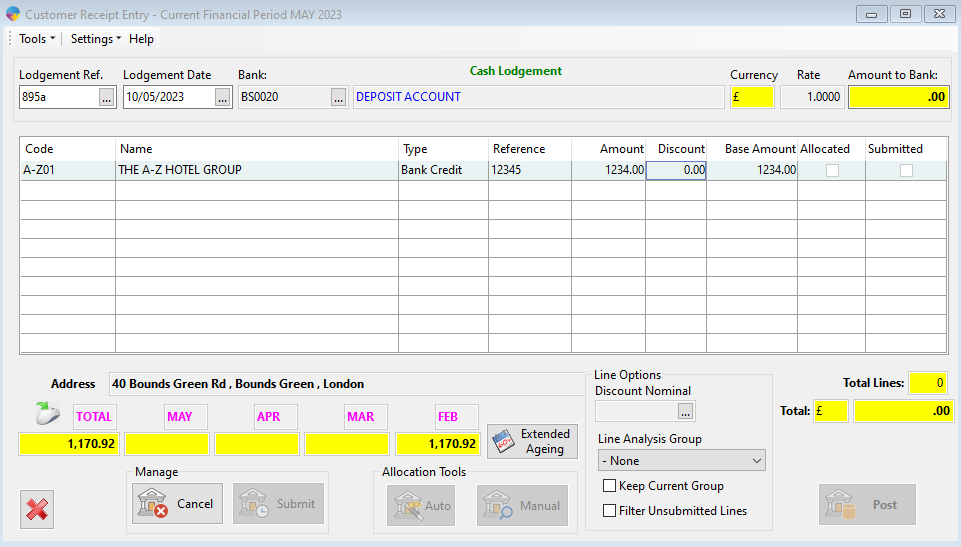
3.Put in a customer in the table by typing in the “code” for the customer of your choice the rest should auto fill
- By clicking Tab or clicking the type it should automatically show the method of payment that you have chosen in the last steps
4.Go To “Reference” and place the data needed for the customer such as “No Ref” or “1234” ETC…
5.Go to “Amount” and place the Amount of money that was received. The Base Amount will auto fill
- If needed you are able to put in a discount at “Discount“
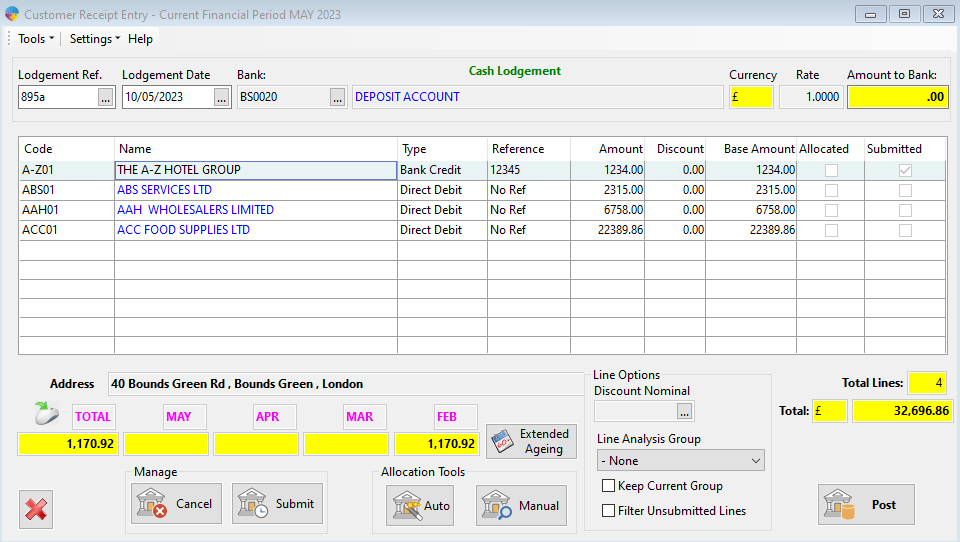
6.You can repeat the steps from before to keep adding more customers to a single Receipt Entry.
7.There are two ways to allocate. Manual and auto
Click on any customer to select it and then click “Manual“

- On the page “Manual Allocation” you are able to allocate the customers manual with many different features that auto allocation does not have.
- You are able to search for Refences by typing the Refences in the “Search For …” box and clicking “Find” would find the Refence and highlight it in the table above.
- You are able to view the Refences with the customer as a invoice if you click “View“
- You are able to Click “Print Grid” which shows you The grid full of refences for that customer of which can be printed if you click on “Print…” at the Report page.
- If you want import a File you can follow these steps Click Here
- To allocate you can tick the box at the end of each Refences to make them allocated and choice ones that should not be allocated by leaving them blank or unticking them.
- If You want you can Reset the allocations made if there was an error by clicking “Reset“
- When you Finish with your allocations you are able to save by clicking the “Save” and yes to confirm your saving or if you just want to leave click the red “X“
Journaling the allocation of a payment
You may want to remove the extra cost that was placed on the product or document that the payment was not a full payment which you can do by Journaling it
1.Go to any allocation which has the amount to pay higher then the allocation and change the allocation so that it would be even.


2.When done click “Save” You will get a pop up that will talk about your over allocation and if you want to journal it. Click “Yes” and click “Yes” again for saving the allocation.
Highlight on the customer your going to allocate then Click on Allocation Tools “Auto“
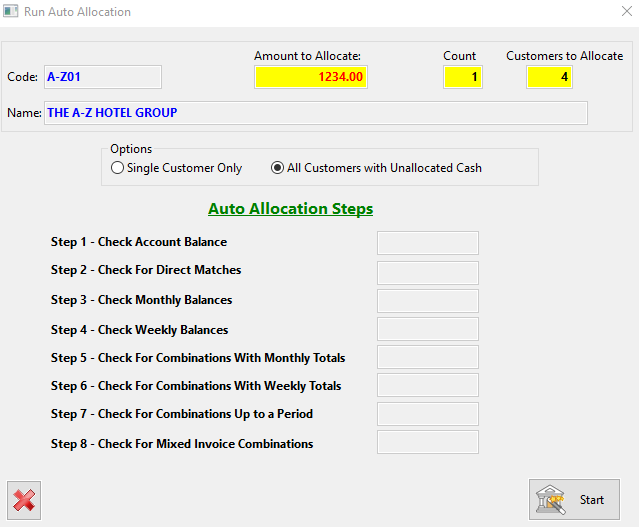
- You can either choice to allocate the customer you have chosen by clicking the option “Single Customer Only” or you can allocate every Customer by Clicking “All Customers with Unallocated Cash“
- When you have chosen your option click on “start” and click “Yes” to start the allocation.
8.Click on “Extended Ageing” and click on any month that includes a base that is bigger than zero or the total as they would have invoice in them and allocations.

9.You will be presented to the page “Customer Statement for …” you can do many things:
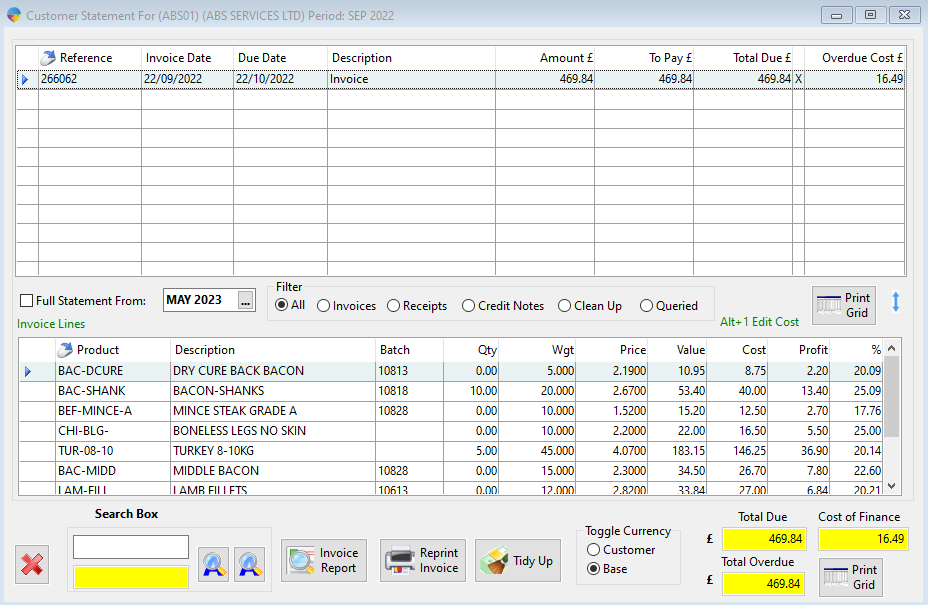
- You can Filter the Invoice lines by clicking any of the circles beside the filter options.
- You are able to search for Refences by searching for them in the “Search Box” and clicking the A with the magnifying glass
- You are able to print the Grid for both the References and the Invoice line by clicking either the top for only References or bottom for only Invoice line “Print Grid“
- You are able to print the actual invoice report by clicking “Invoice Report“
- You can reprint the invoice by clicking “Reprint Invoice” which would bring you to a page which you can choice what you want to do such as previewing, printing or exporting the invoice.
- If you click to “Tidy up” you would be brought back to the Manual of which you can change what is needed to tidy up the invoice.