How to Create a new Sales Order in Season Office
In Season office you can enter a sales order, which once created will move to the ‘unconfirmed orders’ stage or the ‘print pick notes’ stage, depending on your setup. For more information on pick notes, Click Here.
To see how to create a new order, follow the below steps:-
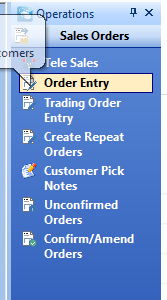
- On the Operations menu, go to Sales Order -> Order Entry.
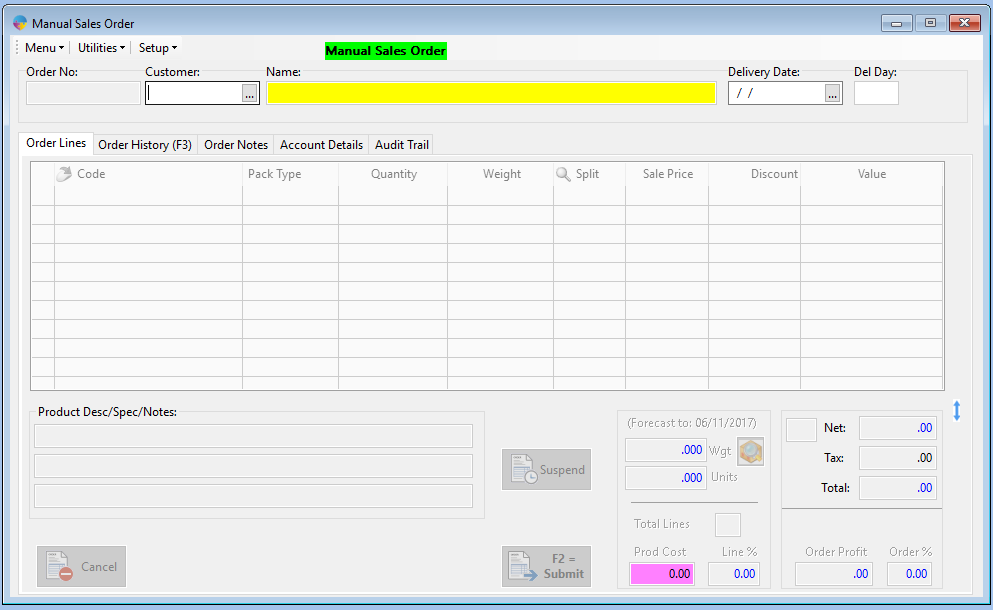
2. This will open up the ‘manual sales order’ window.
3. You will first of all have to enter the header information.
- Firstly enter the customer code or press ‘F4’ on your keyboard and the list of customers will appear, select the customer you want to create an order for and use the ‘tab’ button to tab across to the delivery date field.
- Select the delivery date you want the order to be delivered on, then tab again to start your order. (The delivery date will automatically default to the next available delivery date)
- Once you have tabbed to the order lines you will not be able to go back up and manually edit the delivery date or customer code. To do this you will need to go into the utilities, this link will tell you how to do this.
You can add products to the order in two ways, either manually or via order history. Both steps are described below.
Manually entering Products
- You can start typing in the product code manually or select ‘F4’ on the order line and the product list will appear. Select the product you want and tab across to the next column to fill in the required weight/quantity and confirm/edit the price.
- To delete a line from an order press shift and F2 on the keyboard.
- There are additional fields that can be added into your order entry view, follow this link to see how to do this.
- When you have entered all the products you need, select the submit button along the bottom.
- If you are not ready to submit your order, you can move it to the suspended orders list. Click here to see how to do this.

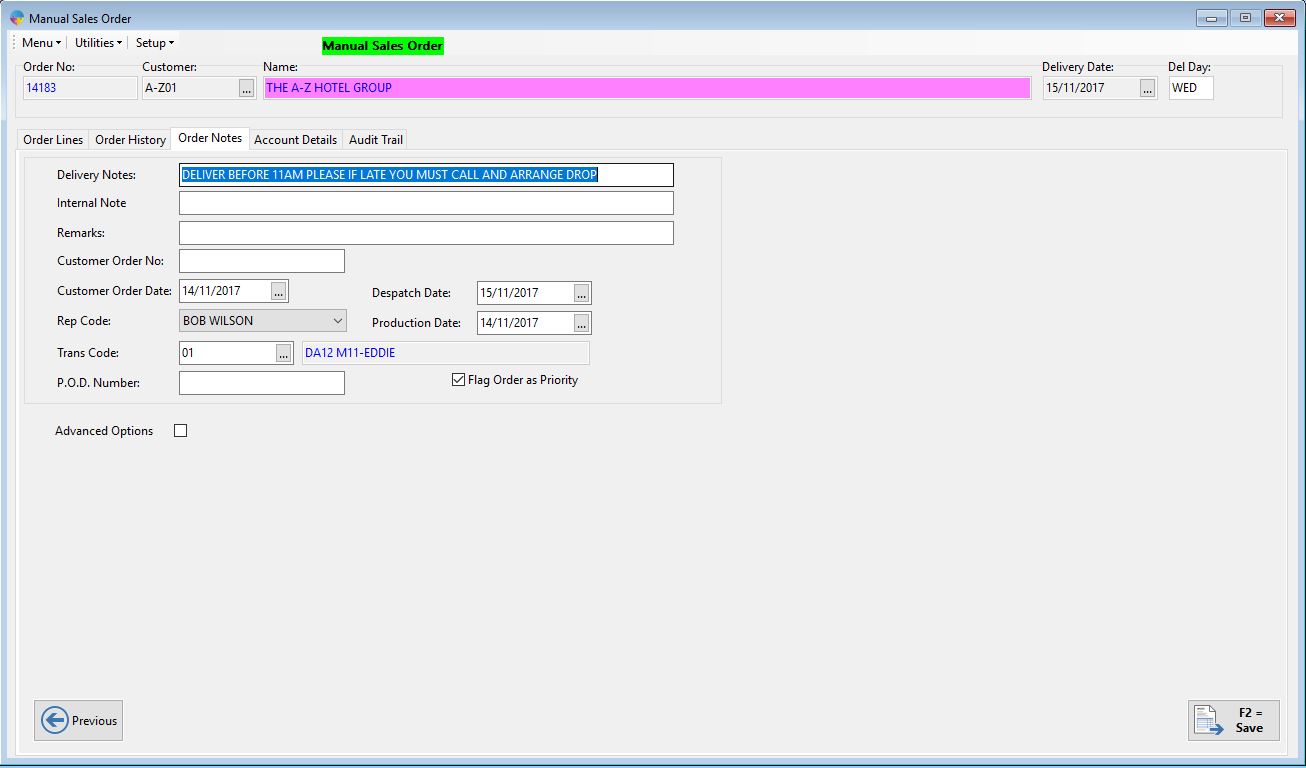
- It will then bring you to the order notes tab, You can enter a delivery note if needed, or change the rep code or transport code if required.
- Once you have confirmed that all the information is correct, click on the save button or press F2 on the keyboard.
- Your order will now move to the pick note stage if your system is setup for pick notes, or else to the unconfirmed orders list.
Order History
To add products to your order via order history, follow the below steps.
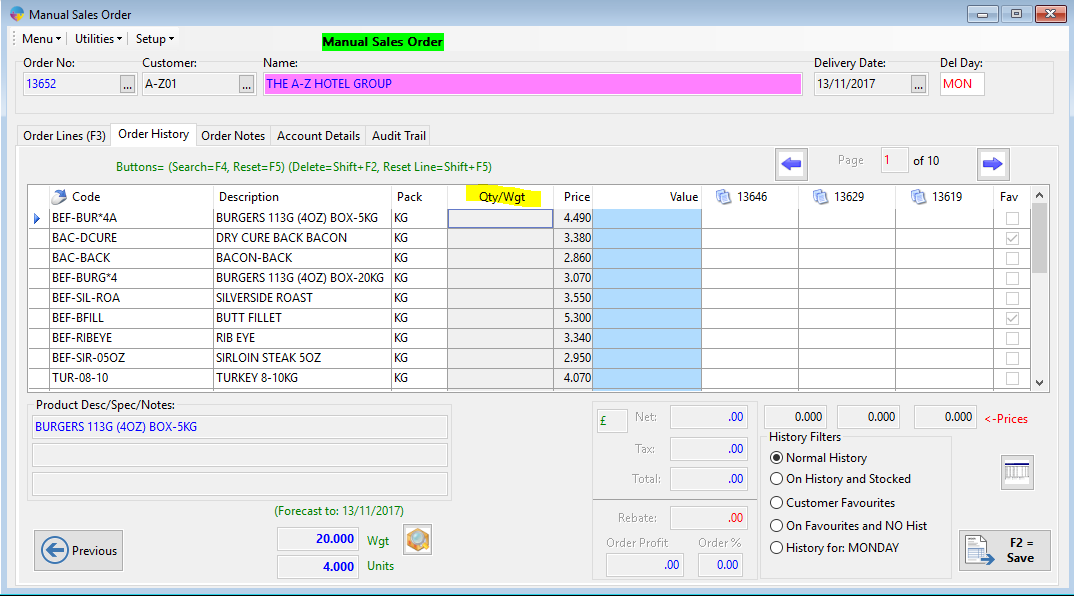
- Click on the order history tab. By default all of the products within order history for the customer will be shown.
- You can filter this list by each of the following options.
- Normal History– This will show the customer’s entire order history.
- On history and stocked- This will show all product in the order history that have stock against them in the system.
- Customer favourites– This will show the customer favourites that are setup for this customer. For more info on setting this up click here
- On Favourites and no history– This will show products that are on the favourites list but haven’t previously been bought by the customer.
- History for: MONDAY– This will show the products ordered previously for the delivery day of the current order.
- To start adding products, you need to enter the quantity or weight for each of the products you need and this will automatically add into the order lines.
- Once you have added all of the products required, click on the submit button or press F2 to submit the order.
- Your order will now move to the pick note stage if your system is setup for pick notes, or else to the unconfirmed orders list.
To see how to print pick notes, Click Here
To see how to confirm a sales order, Click here