How To: Customer Setup
This guide will explain the basics of setting up a Customer within Season Office. You will also find links to more articles explaining some of the options within Customer Setup in more detail.
Setting Up a Customer
- Open the Customer Setup Window. Go to Sales Invoicing or Sales Ledger > Customer Setup.
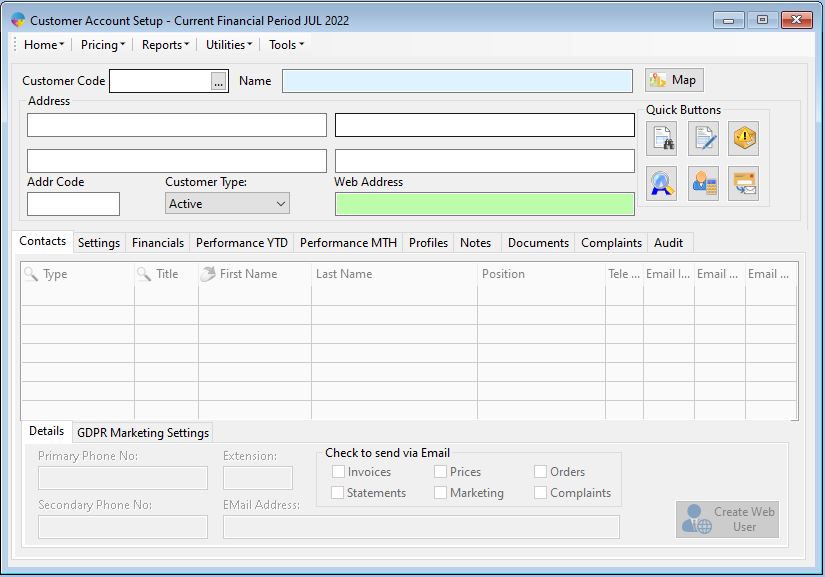
- You will now have your customer set up window on screen. To set up a new customer, you need the screen to be blank, as per the screen shot above. If the window opens and anther customer’s information is being displayed you need to press F5 to clear the data.
- The first thing you need to do is give the customer a code, this needs to be unique. Give your customer a name and then fill in the address details.
- Next, click on the Settings tab > Account Settings tab > Default tab.
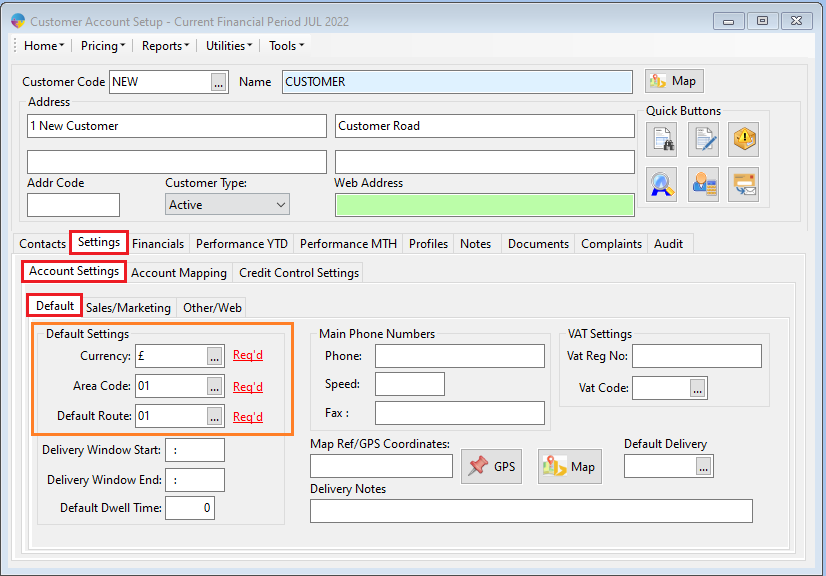
- The last bits of information you are required to fill in are;
- Currency – This is the currency the customer uses, for more information on how to set up currency codes, Click Here.
- Area Code – This is the area the customer is located in, for more information on how to set up currency codes, Click Here.
- Default Route – This is the default delivery route for the customer, for more information on setting up routes, Click Here.
- With all of the above information filled in, that is the minimum required to save the customer. Click the Save icon at the top of the screen or press F2 to save.
You have now set up your new customer but there are many more options and settings available to you. Please see the below links for more detailed information.
Using Quick Buttons – Click Here
Setting up Contacts/GDPR – Click Here
Creating Customer Pricebook – Click Here
Setting up Product Specifications by Customer – Click Here
Setting up Customer Favorites – Click Here
Creating New Delivery Addresses – Click Here
Setting up Contact and Delivery Days – Click Here
How to Change a Normal Account into a Branch Account – Click Here
Turning on the Customer Setup Audit – Click Here
How to Turn On Pick Note Printing – Click Here
How to Set Up Statement E-mailing – Click Here
Mapping Pricebooks, Favorites and Specs – Click Here
Setting a Customer Up for Email Invoicing – Click Here
Setting up Report Queries – Click Here
How to Set Up Dispatch Messages – Click Here
Using Notes and the Bulletin Board – Click Here
How to Set A Customer Up for Weekly Invoicing – Click Here
Setting Up Credit Control – Click Here